Talking to your fellow team members and the ghost forms an essential part of your missions as a ghost investigator. It is what makes Phasmophobia so different and immersive. There are certain Spirit Box phrases and Ouija Board commands lists that you can use to ask questions to Ghosts. The game is still in early access, so you never know, the final launched game can have an even deeper interaction with ghosts. But for all of that, you need to know how to set up mic in Phasmophobia. This guide will show you how to do it easily.
Phasmophobia: How to Set Up your Mic
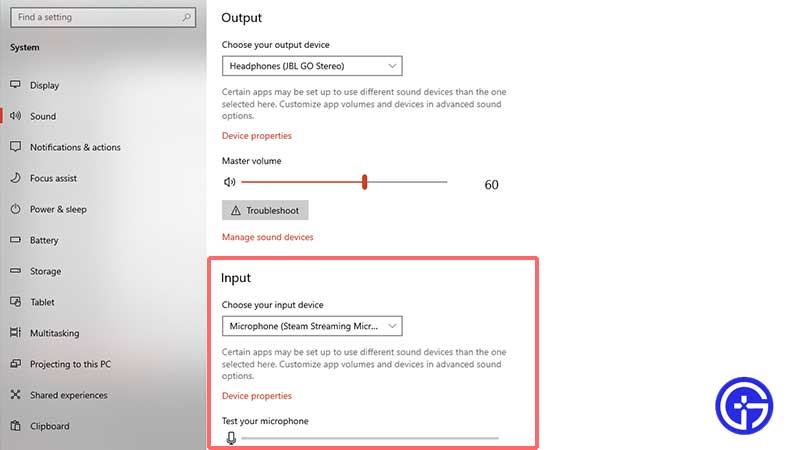
First, keep your mic as the input device (default). Go to the speaker icon on your computer, it will be on the task bar. Right click and choose Sound Settings. Over there you need to choose the input device and keep your choice of mic. Test your microphone right there by talking. The blue input bar should be moving as you speak.

Now it is time to load up Phasmophobia but make sure to not alt + tab to go out and back into the game. That’s because it will lead to the mic not working issue which will affect your experience of the game.
With that in mind, open the game and go to Options. Next, choose Audio. Keep the same input device (mic) as the default mic in Phasmophobia. Doing this will ensure that the mic is recognizes and you can communicate in the game easily.
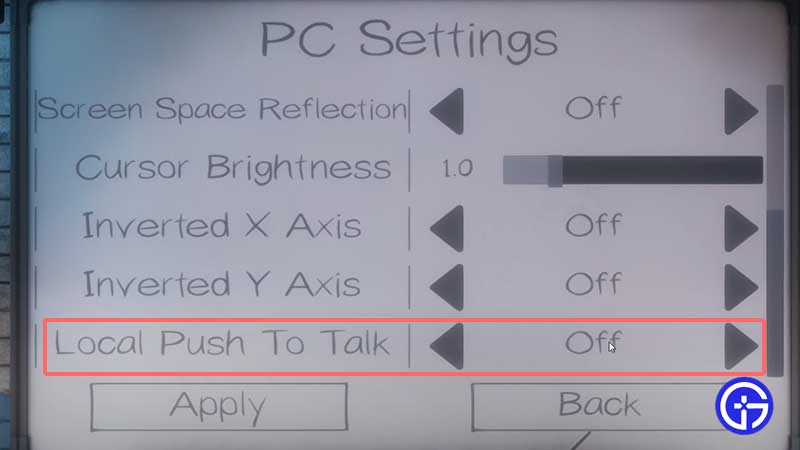
Remember to set the Proximity chat to open mic which means that you can talk to them without pressing any button. This will make things more natural and honestly, easier. Here’s how to change that. Go to Options > PC Settings > Local Push to Talk > Off.

Apart from this, you can rebind the control of voice chat to change it to some other button you are comfortable with. For that, head to Options > Controls and change the Push to Talk buttons right there.
That’s everything you need to know about how to set up mic in Phasmophobia. Do not forget to check our Phasmophobia Wiki guide for more ghost hunting tips.

