The well-received horror game Phasmophobia is at its best when played on your VR headset. And with Oculus Quest 2 being one of the most sold devices in recent years, many players are wondering how to do this. So today we will help you with how to get and play Phasmophobia VR on Oculus Quest 2 with Steam.
Is Phasmophobia on Oculus Quest 2?

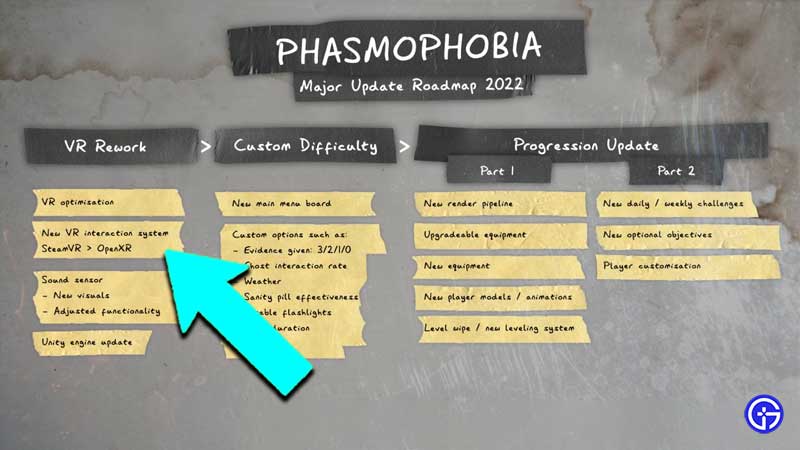
Phasmophobia is currently not available on the Oculus Store and the only way you can play it on Quest 2 is via Link & Virtual Desktop using your Steam library. As per the 2022 Roadmap shared by the devs on Twitter, the first action plan is to introduce the OpenXR interaction system to the game. This could hopefully see more doors opening for the fans to directly get the game in Oculus. But no further details are given out yet.
How To Get Phasmophobia On Oculus Quest 2
To get Phasmophobia on Oculus Quest 2 you can either use Link or Virtual Desktop using Steam VR. This means you will need a PC with the game already purchased on Steam. Then you can use the Steam VR to connect with your Oculus Quest 2 and play the game in one of the preferred methods of your choice.
The game works smoothly without any screen tearing in both methods. If you are having any lag then you have to reduce the bitrate or upgrade your WiFi network for the link to work better. Let’s look in detail at how to get the game running right away on your headset.
Can You Play Phasmophobia on Oculus Quest 2 with PC (Wired)?
Yes, you can play Phasmophobia on Oculus Quest 2 with PC wired connection. Here’s how:
- Start the Oculus app on your desktop
- Connect the USB-C cable from your headset to your PC
- Now you will get a prompt asking ‘Allow access to data’
- Click on the “Allow” button
- Now a new prompt will ask you to ‘Enable Oculus Link (Beta)’
- Click on the “Enable” button
- Now your Oculus Link will start working
- Start the Phasmophobia in Steam
- Enjoy the game
If ‘Enable Oculus Link (Beta)’ is not prompted for you, then disconnect and reconnect the cable. Also, your headset needs to turn on when connecting to your PC, for the prompts to appear.
How to Get & Play Phasmophobia VR on Oculus Quest 2 (Wireless)
Here’s how to get & play Phasmophobia VR on Oculus Quest 2 wireless with Steam:
- First, make sure your GPU is Currently Supported
- Also, try to be in a room as close to your router as possible
- Now download “SteamVR“ to your Steam desktop client
- Then download & open the Oculus PC app
- Click on the “Settings” button
- Then click on the “General” tab
- Scroll down and check if you are on the latest version
- If it’s v37, then make sure your headset is also on the same version
- Now besides the “General” tab, click on “Beta”
- Enable the “Air Link”
- Now wear your headset
- Press on the Oculus button on the right controller
- You will see the ‘Universal menu’ now
- Click on the left side clock
- Now open the panel in “Quick Settings”
- Click on “Settings”
- Open “Experimental”
- Enable “Air Link” using the toggle
- Click on ‘Continue’
- Now ‘Air Link’ will be available in ‘Quick Settings’
- Click on it
- Find your PC on the ‘Available’ list
- Click on ‘Pair’
- A pairing code show in your headset
- Take off your headset and check your PC
- Now make sure the same pairing code is shown on your PC app
- If they are the same, click on “Confirm” in the app
- Now wear your headset again and click on “Launch”
- Start SteamVR on your PC
- Then start Phasmophobia
- Enjoy the game on your Oculus Quest 2 headset
Next time you put on the headset, the game will show up in your Oculus library
That’s everything you need to know about how to get and play Phasmophobia VR on Oculus Quest 2 with Steam. While you are here check out more of our Oculus Guides like how to connect & cast to Roku TV, how to get Discord on Quest 2, and how to find & reset Oculus Pin.

