Minecraft is one of the most popular and creative games today, with endless possibilities for exploration and creativity. Today, we’ll guide you to make your very own painting in Minecraft. So let’s get right into it!
How to Paint in Minecraft
To craft a Painting in Minecraft, here are the items you’ll need:
- 8 x 1 wooden stick
- 1 x wool
These items can easily be sourced from the game without any extra effort. You can source wooden sticks by first acquiring a wooden plank. For wool, you can easily acquire it from a sheep. You can begin by finding a sheep to shear. Once you have found a sheep, select shears from the Hotbar so that it appears in your hand. You can now shear the sheep. Once the sheep have been sheared, you’ll hear a snapping sound and find the wool next to the sheep. Ensure to pick the wool immediately as it may disappear after a while.
- Once you are ready with all the materials, open the Crafting menu by hitting the ‘E’ key and follow the steps to make a Painting in Minecraft given below.
- Upon opening the crafting menu, you will see a 3×3 grid box.
- Once you’ve acquired all your items, place them into the 3×3 crafting grid box.
- Remember, if you want to create a painting it is important you place your items in the exact layout that has been defined in the image below.
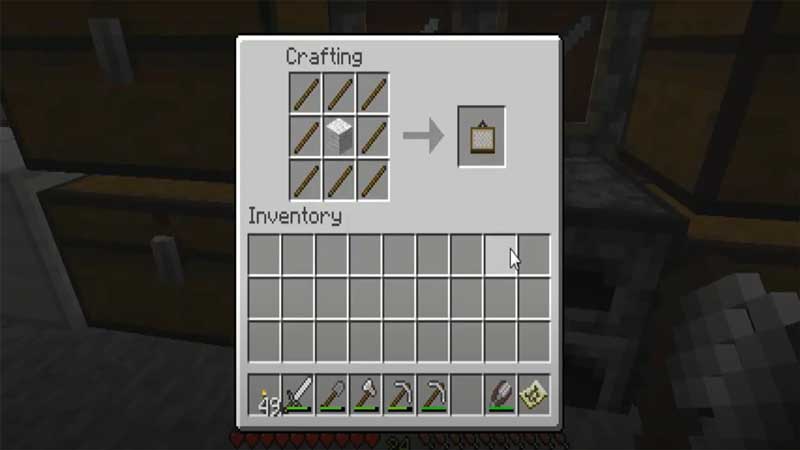
- As can be seen from the image, you need to place 3 sticks of wood in the first row.
- In the second row, place a stick of wood in the first box, 1 wool in the second box, and 1 stick of wood in the third box.
- In the third row, place 3 sticks of wood in all the vacant blocks.
- Once you’ve added all the items in the right order, you’ll find your painting in the box located to your right.
- This is Minecraft’s method of creating a painting, and it really is that easy!
- The final step in the painting process is to add your painting to the inventory.
How to Create a Custom Painting
Minecraft enables you to express your creativity in the form of your very own customized paintings. Stay tuned to check out our guide on how to create a custom painting in Minecraft.
Step 1: Creating a Resource Park
To create your own custom painting in Minecraft, you first need to create a resource pack. Resource packs help you modify textures, models, sounds, and many other elements in the game.
- To create a resource pack, head to the “resourcepacks” folder that is located within the “.minecraft” folder.
- Once you’re here, create a new folder. You can give the folder any name according to your choice.
- Once you’ve created your folder, create a text document within it and name it “pack.mcmeta”. Kindly check to ensure there are no errors in the name as the .mcmeta extension is essential to this process.
- In the text document, enter the exact following words: { “pack”:{ “pack_format”:5, “description”:”Custom Paintings” }}
- In the “Custom Paintings” section, you can choose to add the name f your folder.
Now that you have created a resource pack, you can find it by clicking “Options”, followed by “Resource Packs”. You should be able to view your custom resource pack on the left side. - Click on the triangular arrow on the icon of your resource pack to move it to the right side under “Selected Resource Packs”. Hitting the “Done” button will enable your resource to be loaded into the game.
Step 2:Finding Your New Painting
Creating a custom painting results in one of the 26 paintings in-game being replaced. It is thus important to decide the size of the painting you will overwrite. For example, if you decide to replace an image that has a size of 4×4, you will have to ensure your custom painting is in the 1:1 ratio.
When your image is finalized, you’ll need to save it in a specific manner. Your custom painting will have to bear the ID of the painting it replaces along with the extension .png.
Step 3: Saving Your Custom Image Into Your Resource Pack
- After you’re done creating your custom painting, you can then place it in your resource pack. To do this, you will need to create a series of folders.
- In “Custom_Paintings” (the name of the folder depends on what you’ve named it) create a folder named “assets”.
- Within this folder, create another folder called “textures”.
- Create another folder called “painting” in the “textures” folder.
- You will place your painting in this folder. If you followed all the steps mentioned above correctly, you should see your painting in-game when you create a painting of the same size.
It’s important to note that your painting will only be visible to you if you’re playing on a shared Minecraft Realm. Unless other gamers go through the same steps, they’d only be able to view the original “pointer”.
How To Make a Secret Painting Doorway
If you thought creating custom paintings in Minecraft was cool, then the ability to make a secret painting doorway is going to blow your mind! Check out the guide to creating your very own secret painting doorway in Minecraft below:
- To begin making your secret painting doorway, look for the possible location of your painting from the exterior of your house.
- Once you find the location, break the wall and delete the top block.
- Take out your signature block and place it after you’ve deleted the top block.
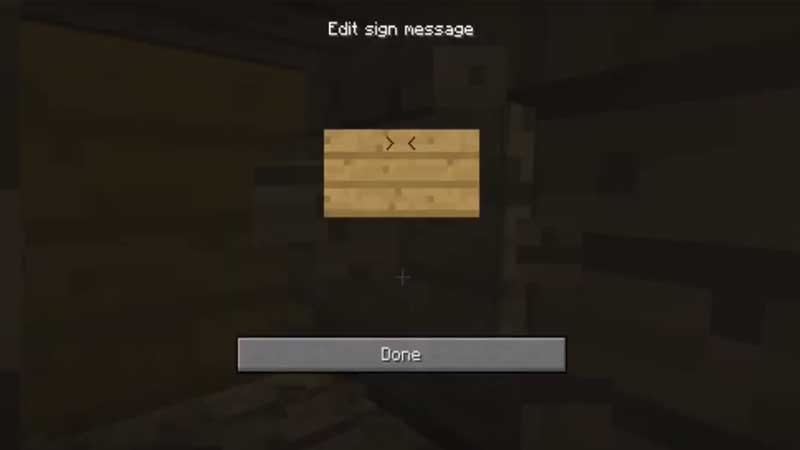
- Repeat the process for the second block too.
- Remember to complete the process quickly as failing to do so may result in your painting being deleted.
- Now that you’ve attached both the sign blocks, you can proceed to create your secret room.
- Remember to convincingly conceal the surroundings of the doorway so as to not raise any suspicions from unwanted elements.
- And that’s it! You now have your very own secret doorway in Minecraft.
So there you go. These were the steps to make a painting in Minecraft. As you can see, it’s really easy and can be done in no time. So don’t wait, go out there and get painting!