Meet Your Maker has a unique concept of making your own base for other players where you can pick different kinds of blocks, rotate them and place them wherever you want. You also can choose to raid other players’ bases and maybe take inspiration from their builds. Let’s take a look at how you can rotate items in your base to create that perfect base in Meet Your Maker.
How To Rotate Chosen Items In Meet Your Maker

In order to get to the rotate part in Meet Your Maker, let’s look at how you can start making your base. After finishing the tutorial, head on over to your Command Center, you will have a ‘Build’ section here. Here, you are going to go to claim a new Burial Site. Choose one based on factors like capacity and cost and it will be added as your own.
Once you load into the map, you will notice a lot of blocks already present on the Burial Site. These are pre-existing blocks that you cannot remove and you have to work around them. While this is due to balancing, it is also the only real limitation you will have when it comes to building. Now let’s get into detail about items and how to rotate in Meet Your Maker.
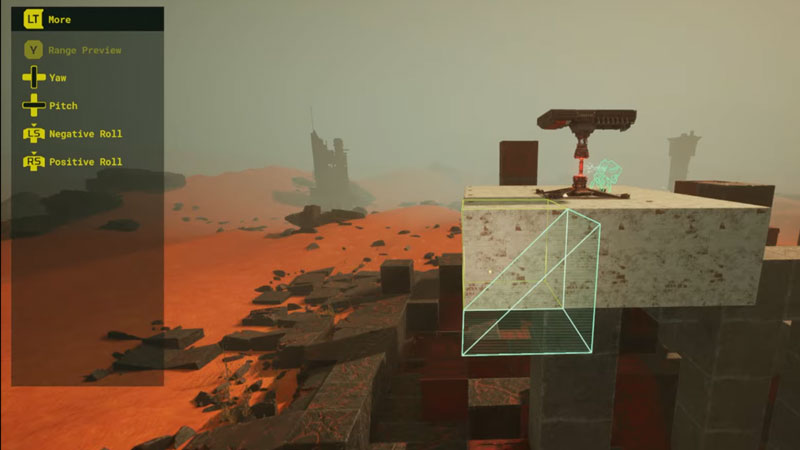
On the left side, you will see all your controls for placing blocks and moving them around. But there won’t be an option to rotate, at least at the first glance. When holding a block that you want to rotate, you need to go into the ‘more’ section of the menu by pressing the highlighted button beside it. It will be LT on XBOX and L2 on PlayStation. Once on this menu, you will see options to Pitch, Yaw, Negative Roll, and Positive Roll. These are all your options to rotate the object. Experiment around with these options to get your desired rotation.
That is all you need to know on how to rotate items in Meet Your Maker. For more guides like this, check out our other articles on Meet Your Maker like how to buy new traps and how to play with your friends.

