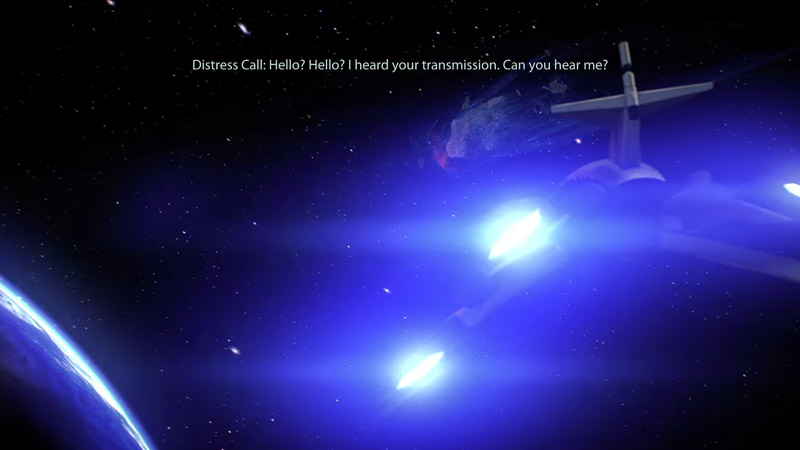
Mass Effect Legendary Edition quest ‘bring down the sky’ revolves around the x57 Asteroid which is a metallic asteroid that was supposed to be mined for its resources to build an orbital port facility for Terra Nova. Initially, revolving around the Borr’s orbit, it was derailed to get into the Terra Nova’s orbit by using fusion torches. However, something does not seem right, as all the communications have been lost from the engineering team. Three fusion torches have reignited and the asteroid is approaching Terra Nova at an increasing speed. All you have is four hours to save the planet and stop the asteroid from crashing into it.
Asteroid X57 Bring Down The Sky For Mass Effect Walkthrough
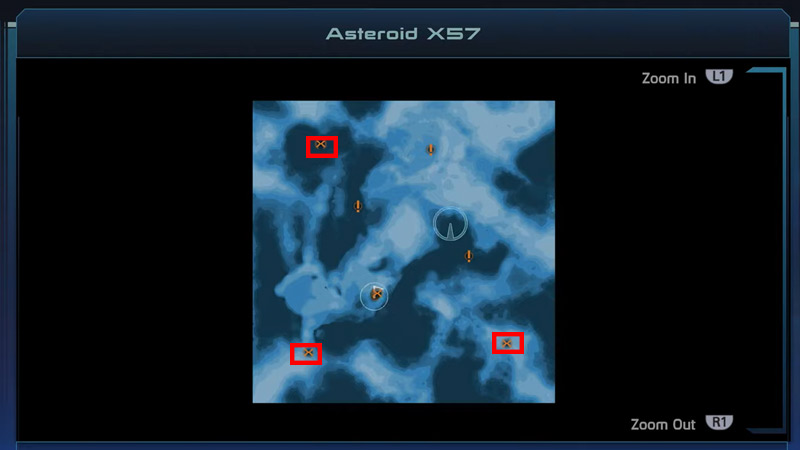
Your goal is to shut the fusion torches to stop the acceleration of the x57 asteroid. The asteroid is in the Asguard system of the Exodus Cluster of Mass Effect. A good way to easily get through this mission is to have a team that is strong in combat.
Upon arrival, you will find a dead body. By the looks of it, the victim, G Mendel, has been beaten before getting shot. Get inside the small station present there and check the station log. This is the first clue that will give you some insights. You will also find x2 Medi-Gel so do stock that up for the later part of this quest.
How to Disable the First Fusion Torch on X57 Asteroid?

Your next stop is the Fusion torch that is visible. Approach with caution, and there you will see 5 turrets surrounding the fusion torch with one turret in the opposite direction of the others. Their build is such that they go back underground. So you need to be in mid-range proximity for these turrets to reveal themselves. Only then you can shoot them down. We recommend that you take down that turret that is solo in the opposite direction first so that you only have to look out for attacks from one direction after that. They are relatively easy to take down if you are close enough to them.
Once you take them down, you will be able to get into the entrance console that is between these turrets. Upon entering, you will come face to face with the Batarian Troopers. They will initially release their three pet creatures on you which are relatively easy to kill. There will be 7 Batarian troopers that you will need to kill in this room. Once dead, enter the room that is on your far left end. Inside the room on your right-hand wall, you will find a storage locker that you will need to override either manually or by using 20 Omni Gel. This will give you some vital loot.
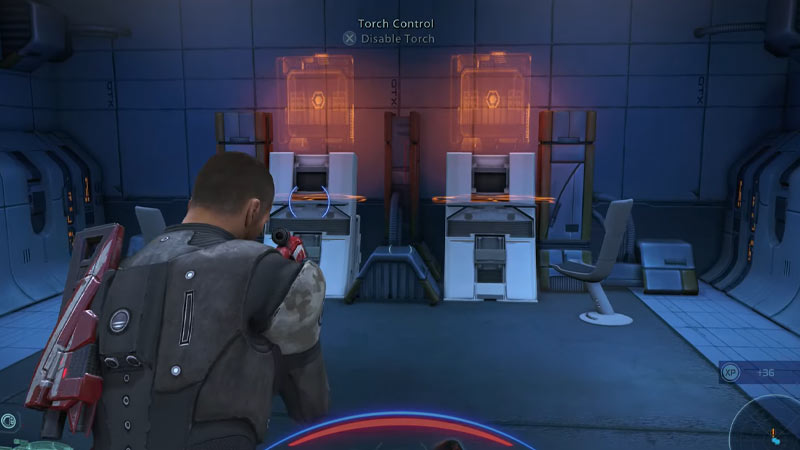
Now head on to the upper level of the building. There on your left, you will find the room where you can disable the torch from. Simply interact with the fusion torch and you can choose to manually override it or use 25 Omni gel to do so. There is also some loot at the entrance of the room which you might want to get. This will initiate a cut scene with Kate Bowman from the other end of the communicator. She is an engineer that was assigned to the x57 Asteroid and the one who first contacted you.
Once done, go down the building and you will be met with Simon Atwell who is the chief engineer. He will tell you the consequences of the X57 Asteroid crashing and warn you about the live blasting caps around the next fusion torch. He will give you the X57: Missing Engineers assignment.
Disabling the Second Fusion Torch
Get into your vehicle after the dialogue and head on to the transmission tower first. Repair the tower to get the locations of the engineers for the X57: Missing Engineers assignment. Now you can head onto the next Fusion torch. On your way there you will come across another aid station that you can check for more insight. You’ll also find another dead engineer there.
Once you approach the second fusion tower, you will get a warning that will make you abandon the vehicle and approach on foot. There will be three turrets that you can take out using your vehicle. Once you abandon your vehicle and cross the line of yellow torches, you will be ambushed by some enemies. Use a long-range weapon to take these enemies down before advancing further. It will be useful to have a shield active at this point too. We suggest you do not move much while taking them down and be stationary. Once they are dead, advance further. They will keep spawning in short periods of time.
How to get past the live blasting caps on Asteroid x57?
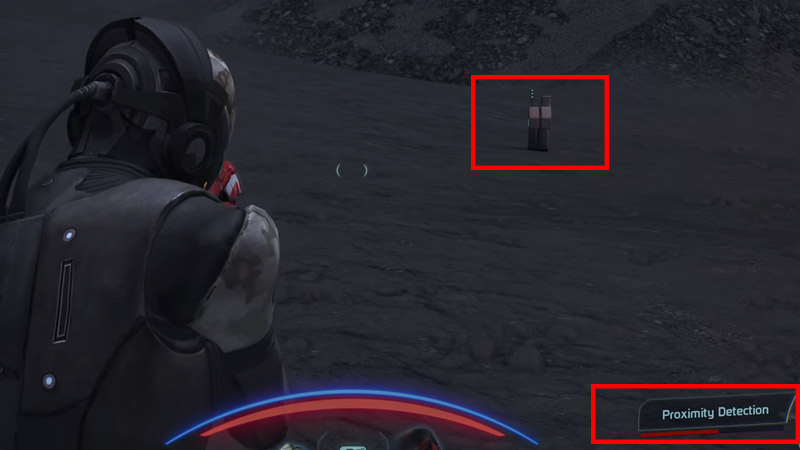
You will see a line of live mining caps that will start beeping as soon as you are in close proximity to them. There will a proximity detection bar on the bottom right corner of the screen that will start going higher the closer you get. If the bar is full, the mine will blast and you will die.
The best path to take is slightly from the left when you are directly in front of the side of the console like shown in the picture below:
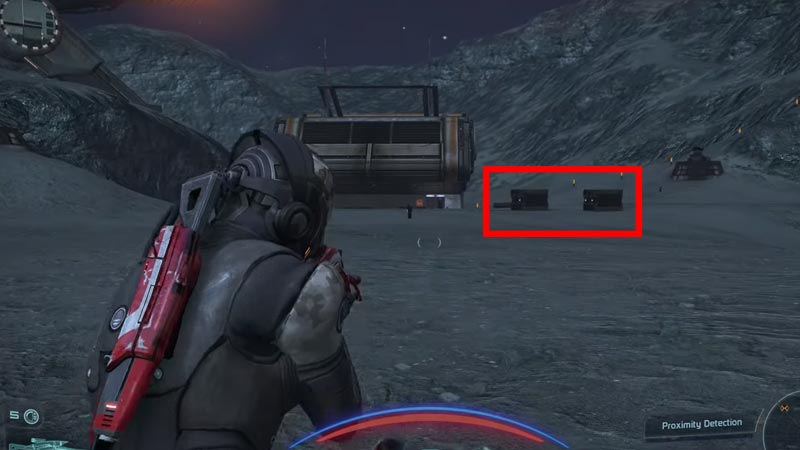
Takedown the attacking enemies first and then use the two crates on your slight right as an anchor point. You should be able to get those without detonating any mines. Once past these, there will be two other crates right in front of them. Use them as your second anchor point and go straight towards them. You can also use them as your cover from the enemies. From there, entering the console should be simple. Simply go straight to the door and you will be able to disarm the blasting caps.
Once inside the building, Rocket Drones and Batarian Troopers together will ambush you and there will be around 7 of these. Once you take them down, just like the first collect the loot from the first level. Then head on to the second level and disable the second fusion torch. The only difference is that here you will find a few enemies on the second level too. At this point, Kate will contact you again informing you that the enemies might blow up the whole facility. Kate gets disrupted at this point and a cut scene plays where she is caught by the Batarians and her crew member is killed. After this, head down back to your vehicle and reach your final destination to the third Fusion torch.
Final Fusion Torch of Asteroid x57 in Mass Effect
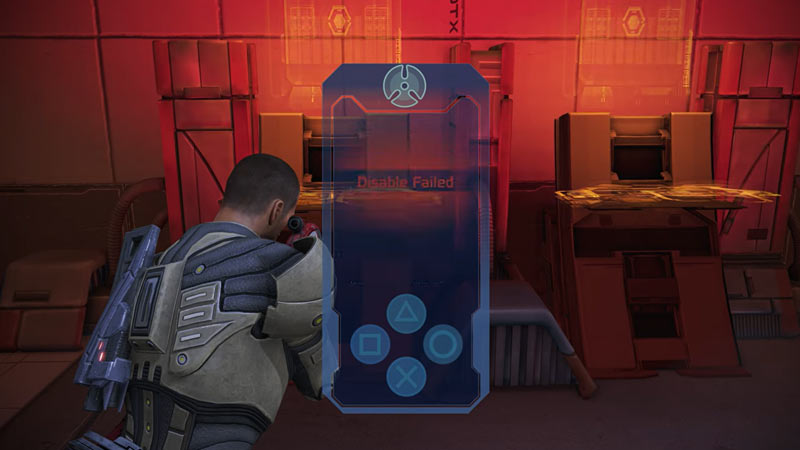
As you approach the third fusion torch, you will again be face to face with the 4 turrets guarding it. Take them down and enter the room. There you will come face to face with 7 other enemies and their pets. Take them down too, collect the loot from the base level, and head on to the upper level. Here when you will try to disable the fusion torch, you will not be able to. So you will have to try it again until you override it successfully. Once down, you will come face to face with Charn and his men. Here you will have a decision to make.
You will have two options, to end it peacefully or to attack. If you go about peacefully, you will offer Charn to take down his boss, Balak, and make him the one in command. He will agree to that and go away peacefully. If you do not do this peacefully, you will not only have to face Churn, but he will also call for more troopers and you will be outnumbered.
You will then head to the main facility where you will encounter drowns and troopers from Balak. You will meet them at the grenade box and aid station. Once at the facility, you will greet a heavy battle just like the rest of the two times but with more enemies than before.
Balak Choices in Mass Effect
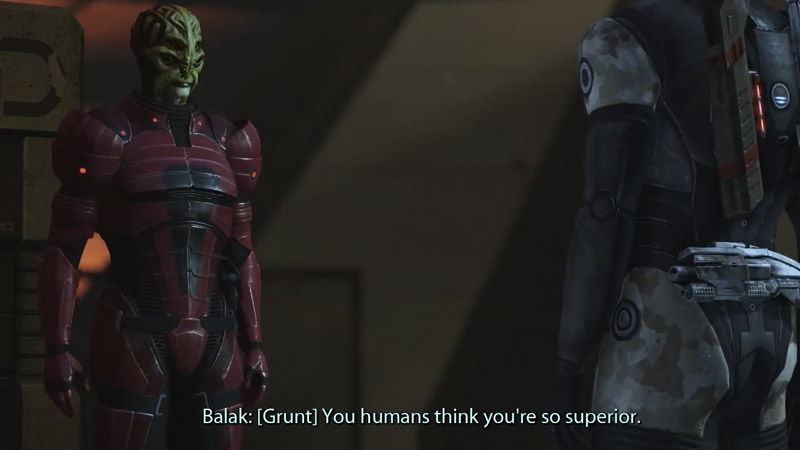
When you go upstairs and come face to face with Balak you will realize that he has hostages. You will have two choices – Attack him or let him go. We have an in-depth guide explaining the consequences of both these options that you can read here – Balak Choice Guide.
You have now saved Nova Terra and Simon will come to reward you for the quest. This is when you will complete the quest. So that is all for our guide on Mass Effect Legendary Edition: Asteroid X57 ( Bring Down the Sky). If you would like to know how to skip or jump cut scenes or how to get the Spectre gear in the game, do check out our articles on the same.