Contrary to popular belief that you need a PC to make items, even Mobile players can get creative to make them on their phones. Roblox Mobile players can make shirts, pants, and other items irrespective of whether they use Android or iOS. And the best part is it isn’t even that tough, you just need two apps for it. So in this guide let us take a look at how to make a Shirt on Roblox Mobile.
How to Make a Shirt on Roblox Mobile
Before we get into the steps, as mentioned above you will need two apps for this to work. They are, Picsart and Google Chrome. You don’t necessarily have to use these two, you can any browser and image editing app but for this tutorial, we will use them. You will also need Roblox premium or at least a minimum of 10 Robux to upload your shirt. The steps in this tutorial can be done on both Android and iOS devices. Now let us check the steps.
- Search on google for Roblox Shirt Template Transparent.
- You will get many results, be sure to save the one that is transparent.
- Open Picsart and click on the add button in the bottom center of the main screen.
- Now add the Roblox shirt template image to start editing.
- At the bottom, you will find several tools scroll to find the Draw tool and click on it and choose Draw.
- Next, choose Shape from the options available on the bottom of the screen.
- Here change the shape to Circle, size to 8 pixels, and leave the opacity as it is. Make sure the last option is set as stroke and not fill.
- Add this circle to where the head should be in the template image.
- Fill the areas outside the circle and under the template lines.
- Similarly, you can also fill the sleeves in the template.
- You can also add text or stickers here.
- Once you are happy with the design of your shirt click on the right arrow icon on the top right corner of the screen.
- Here you can select the Gallery to share and save the image in your gallery. After that click on Done.
- Now open the browser on your phone and go to Roblox, you will get the option to continue in-app but choose Continue in browser.
- Login to your account and click on Create.
- Next click on the three dots on the top right corner of Google Chrome, scroll down and check the Desktop site option or an option that says request desktop site.
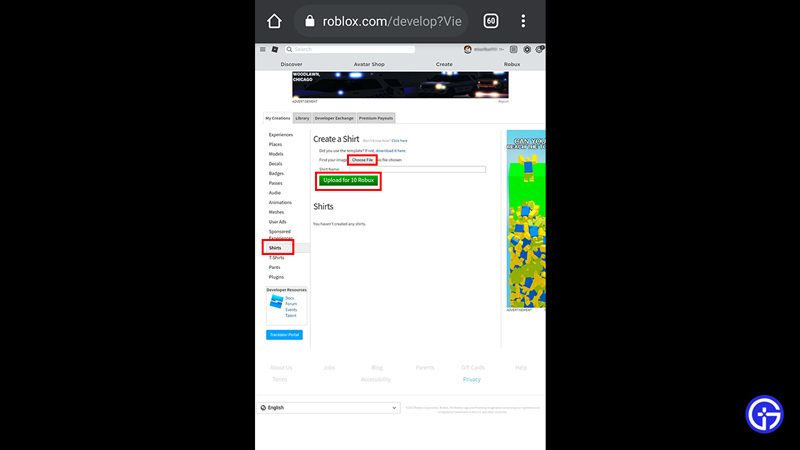
- Now under the My Creations Section click on the Shirts option on the left side of the screen.
- Here click on choose file and select the shirt file you made.
- Give your shirt a name and click on the upload button.
- You may need to verify a captcha before uploading.
- After it gets uploaded click on your Shirt name.
- It will take you to another page with the shirt open.
- Click on the three dots on the right and press configure.
- Scroll down and give your shirt a description.
Do remember that if you are adding any text or stickers to your shirt then check the Roblox ToS before doing it. This will ensure your shirt follows the community guideline and doesn’t get removed. You can also sell your shirt by enabling the Item for Sale option and setting the Robux amount for it.
That covers everything you need to know about how to make shirts in Roblox mobile. Be sure to check our other guides on how to appear offline or how to whisper in Roblox.