Glaives were introduced back then during The Witch Queen story expansion in Destiny 2. Ever since it has been in fashion and used by several Guardians. The Winterbite is the newest addition to the Glaives collection following the release of the Lightfall campaign. One of the main highlights of this weapon is that it fires a floating ball that can freeze the enemies around you. It deals with Stasis damage and can be equipped in the Power weapon slot. But getting this weapon can be a bit time-consuming as it will take a minimum of three days to get this Exotic Glaive. So, check out our guide on how to get the Winterbite in Destiny 2.
How to Get the Winterbite in Destiny 2
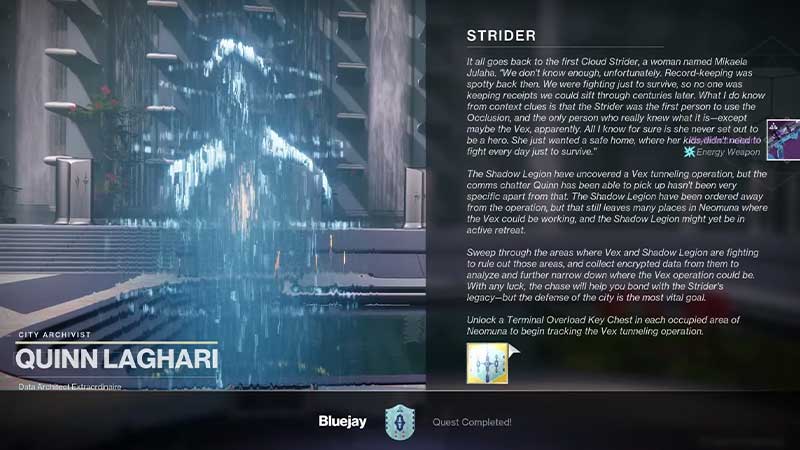
Before we start, you must complete the Lightfall campaign to get the Strider quests that reward the Winterbite. Once you complete the campaign, head to the Wall of Heroes and interact with Archivist Quinn Laghari. But Quinn won’t task you with the Strider quests right away. Instead, you have to complete the Welcome to the Hall of Heroes and three Memorial quests to receive it. These memorial quests are Stargazer, Maelstorm, and Bluejay.
After completing the above quests, you will unlock and receive the Strider quest. Scroll till the end to find out how to complete this mission.
Strider Quest Full Walkthrough
Follow the below steps to complete the Strider quest and get the Winterbite in Destiny 2:
- For the Strider quest, you need to complete the Terminal Overload activities in the three Patrol areas in Neomuna.
- You have to open three Terminal Overload key chests around the Neomuna region to complete this quest.
- But these Patrol areas rotate every 24 hours. So, you must wait for a day to open the chests with the Terminal Overload keys.
- These patrol zones always rotate in the following order respectively:
- Zephyr Concourse, Ahimsa Park, and the Liming Harbor.
- You can find these keys by opening the chests around the Neomuna region or at the end of the Terminal Overload activities.
- After opening all the Terminal Overload chests, head to the Gilded Precept Lost Sector to collect the Data cipher.
- This lost sector is located to the right of the Calus ship in Ahimsa Park. Over there, you would also face some Shadow Legion enemies.
- While defeating them is relatively easy, make sure to get the loot in the chest that has the Data Cipher.
- Then, visit the Archivist who will task you with another quest.
- You have to destroy the Hydras and shut down the confluxes at Maya’s Retreat.
- Once you complete this last activity, head to Archivist and speak with her to claim the Winterbite exotic glaive.
That’s everything covered about how to get the Winterbite in Destiny 2. If you liked this guide, check out our guides on how to get the Quicksilver Storm Catalyst, Ikelos weapons, the Limitless Horizon Emblem, and more Destiny 2 Guides on our dedicated section right here on Gamer Tweak.