Is your Xbox controller not working correctly? Are the buttons unresponsive or sticking? Don’t worry, you’re not alone. This is a common problem with Xbox controllers, but it’s usually easy to fix.
In this guide, we’ll walk you through the most common troubleshooting steps for Xbox controller buttons that are not working. We’ll also provide some additional tips that may be helpful.
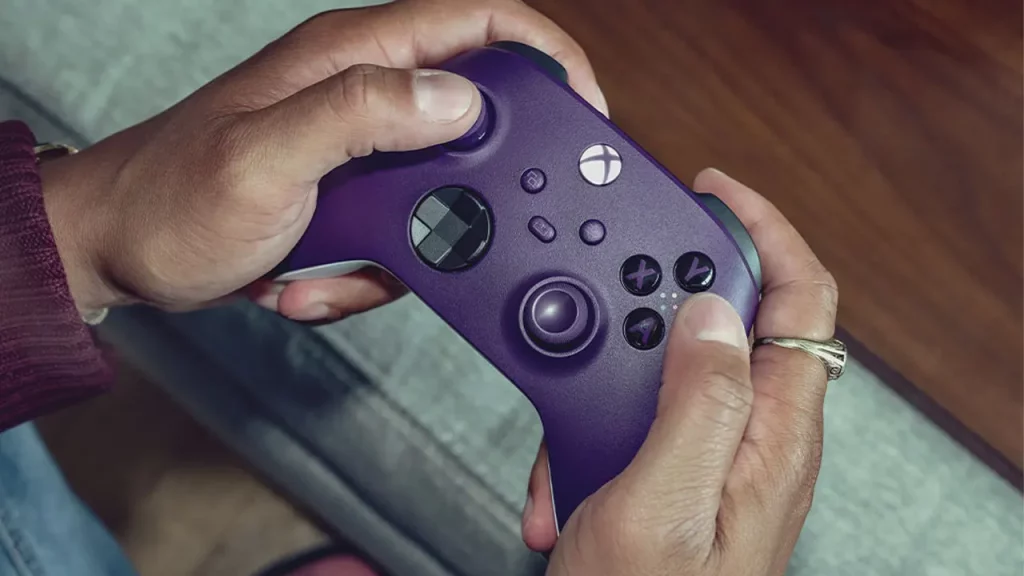
In this article, the word “button” refers to any control on the Xbox wireless controller, including:
- Left stick and right stick
- Left bumper and right bumper
- View button
- Menu button
- Share button
- Xbox home button
- Directional pad (D-pad)
The steps below should be the same whether you’re using an Xbox One controller, an Xbox Series X/S controller, or an Elite controller. So, without further ado, let’s get started!
Why did my Xbox Controller Buttons Stop Working? Common Causes
Here are the common cause of Xbox controller buttons not working, which can help you avoid some of them again:
- Dirt and debris: Over time, dirt and debris can build up on the buttons and prevent them from making proper contact.
- Wear and tear: With heavy use, the buttons can become worn out and stop working properly. This is especially common with the analog sticks.
- Damage: If the controller has been dropped or damaged in any way, this could also cause the buttons to stop working.
- Software issues: Occasionally, glitches or bugs can cause the controller buttons to malfunction.
- Hardware problems: Sometimes, the problem may be with the controller hardware. This is less common, but it can happen, especially if the controller is old or has been heavily used.
How to Fix Xbox Controller Buttons Not Working Issue
If your Xbox controller buttons are not working, here are an easy five steps you can use to fix the problem:
- Power cycle your controller.
- Test using a second controller.
- Clean your controller.
- Disconnect all batteries, including the Play & Charge kit battery pack.
- Update controller firmware.
- Use the Xbox Accessories app (available on PC & Xbox).
- Request an Xbox controller replacement.
Let us look at these five steps in more detail, explaining why each of these fixes might work or how it helps to solve button problems relatively easily as suggested by the official Microsoft support team.
Power Cycle Your Controller
If you have any problems with your Xbox controller, it is always a good idea to try power cycling it first. This is a quick and easy way to fix many minor issues without resorting to more complex troubleshooting steps. To power cycle your controller:
- Hold down the Xbox button on the controller for 5-10 seconds.
- Wait until the controller turns off.
- Then, wait for another 5-10 seconds.
- Hold the same Xbox home button again.
- Now, the power cycle is complete, and this will turn the controller back on.
Test Using A Second Controller
If you have access to another controller or can borrow one, this can speed up the “testing” phase. Connect the second controller to your Xbox console or PC. Open a game or app that uses the controller buttons. Try pressing the buttons on the second controller. If they work, the problem is likely with the original controller. If they do not work, the problem may be with your Xbox console or PC.
If you can’t use a second controller, don’t worry; we can use the “Xbox Accessories App” to figure out all the problematic buttons on your controller.
Test Using the Xbox Accessories App
With the Xbox Accessories app, you can customize your controller buttons and triggers, especially if you have minor issues like dead zones.
The Xbox Accessories app only supports Xbox One and Xbox Series X/S controllers. To ensure compatibility, update your app (on PC or Xbox) and ensure you have the latest version.
Most features are not supported over Bluetooth, so use the Xbox Wireless Adapter or a USB cable to connect and configure your controller.
How to Use it on Windows PC
To open the Xbox Accessories app on Windows 10 or 11, press the Start button, type Xbox Accessories, and select it from the list. Then, sign in. If you don’t have the Xbox Accessories app yet, you can get it from the Microsoft Store.
To use the Xbox Accessories app on your PC, connect your controller with a USB cable. If you have a laptop, however, you can use Bluetooth to connect the controller. Remember that if your controller is from before 2016 (before Model 1708), it might not have Bluetooth support.
How to Use it on Xbox Consoles
To use the Xbox Accessories app on your console, connect your controller with a USB cable to the console, then follow these steps:
- Press the Xbox button to open the guide menu.
- Under Profile & system > Settings, go to Devices & connections > Accessories.
- Click the lower right “Beaker” icon.
- This will enable the “Test Mode.”
In Test Mode, you can check the functionality of all the buttons and triggers on your controller, as well as the vibration motors and rumble triggers.
The Test Mode can help you find underlying issues with your controller, even if the buttons have issues you haven’t identified yet.
Here are some specific things you can do in Test Mode:
- Test the buttons and triggers by pressing them. If a button or trigger works properly, it will be highlighted in the app.
- Test the vibration motors and rumble triggers by moving the sliders.
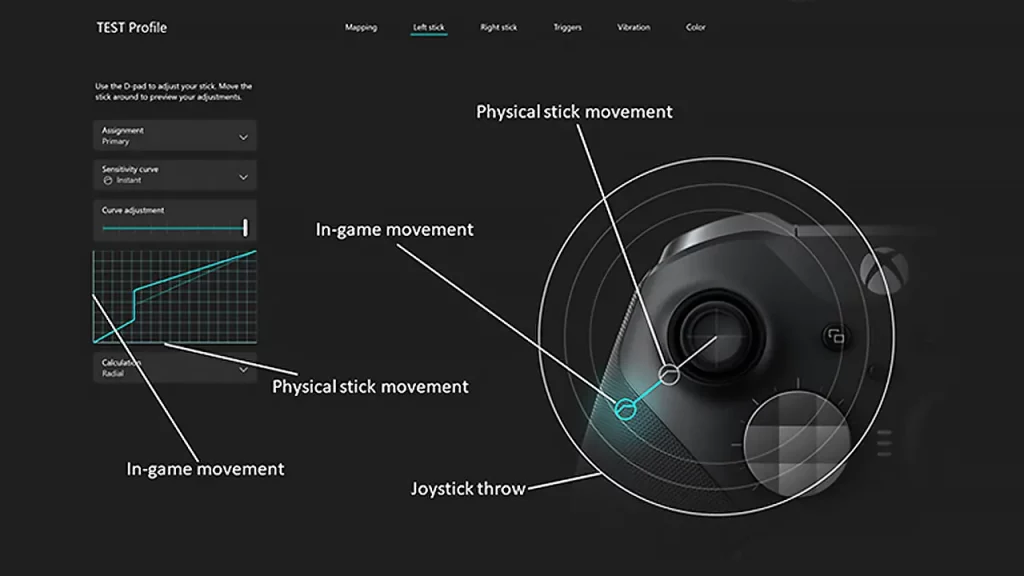
- Test the analog sticks by moving them around. The app’s circles will show you how far the sticks are being moved.
- Change the dead zones for the analog sticks. The dead zones are the areas around the center of the sticks where no movement is registered. You can adjust the dead zones to make them smaller or larger, depending on your preference. Use the dead zone slider below “Deadzone” to increase the dead zone.
- Change the button mapping. You can remap the buttons on your controller to different functions. For example, you could remap the B button to the X button.
To exit Test Mode, click the View button + Menu button together.
If you find any problems with your controller in Test Mode, try adjusting the settings (like dead zones) or updating the firmware. If you’re still having problems, follow next steps.
Disconnect All Batteries
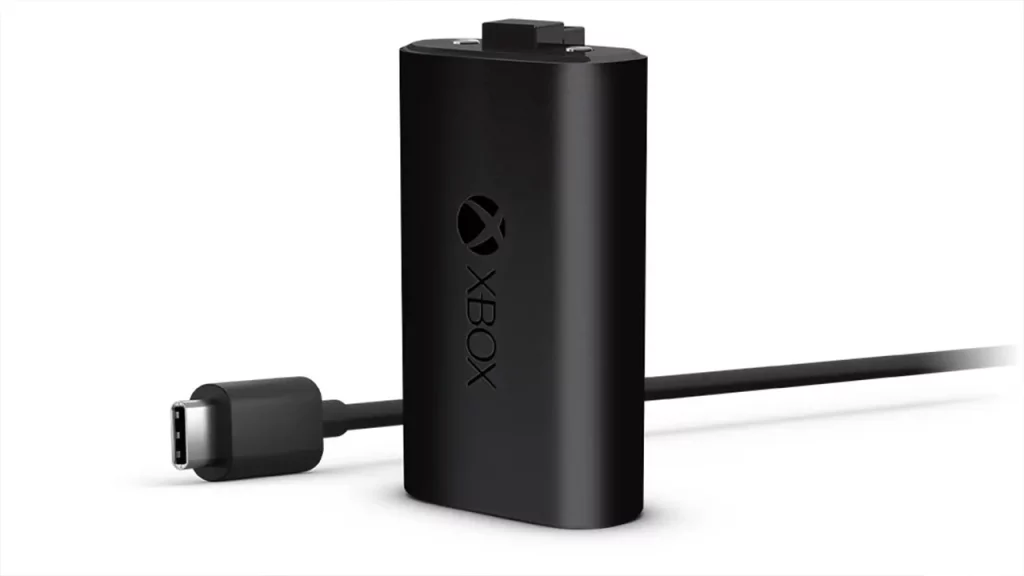
Before going to the next phase, we must remove all the controller batteries, like AA (LR6) alkaline batteries, Xbox rechargeable battery pack, Xbox One Play & Charge Kit, or any other third-party rechargeable batteries.
Clean Your Controller
The best way to fix unresponsive Xbox controller buttons is to clean them. Yes, you heard it right. Confirming nothing is lodged in the thumbsticks or buttons is a very understated, simple solution. To clean your controller properly, you must follow a specific process.
As mentioned above, we strongly recommend disconnecting your controller’s batteries before cleaning it. Here’s what you will need:
- Microfiber cloth.
- Mild soap and water.
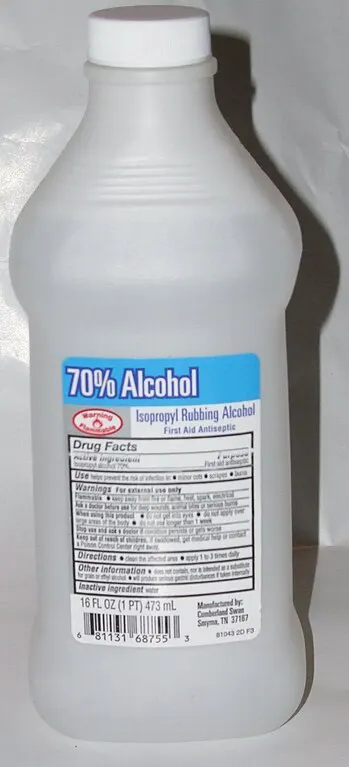
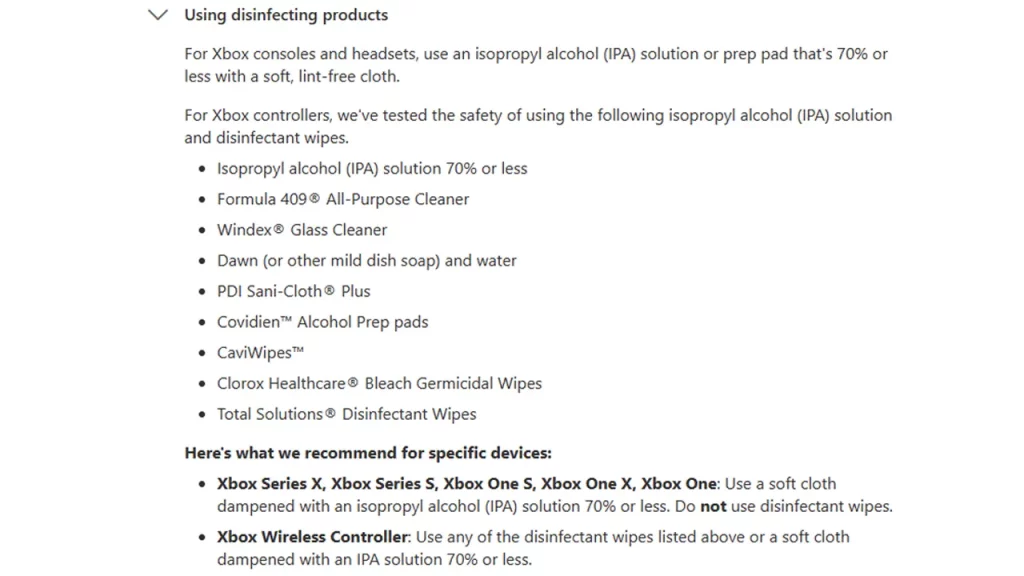
- 60–70% isopropyl alcohol solution.
- Can of compressed air.
- Cotton swabs.
Once you have some or all of them, here’s how to go ahead:
- Power off your controller.
- Disconnect it from any power sources. This includes removing the batteries or unplugging the controller from your Xbox console or PC. This will help to prevent any accidental damage to the controller’s electronics.
- Dampen a microfiber cloth.
- Use your chosen cleaning solution. Be careful not to over-saturate the cloth, as you don’t want any liquid to seep into the controller’s electronics. If you are using soap and water, dissolve a small amount of mild soap in a bowl of warm water. Dip the microfiber cloth into the soapy water and wring it out until it is damp but not dripping. If you use isopropyl alcohol or disinfectant wipes, dampen the microfiber cloth with the solution or wipe.
- Wipe down the entire controller.
- Clean everything, including the buttons, sticks, triggers, and any other areas that are dirty or sticky. Pay special attention to the areas around the buttons and thumbsticks, as these areas can tend to accumulate dirt and grime. You may also want to use a cotton swab dipped in a cleaning solution to clean the smaller areas of the controller, such as the ports and crevices.
- If you use soap and water, rinse the controller with a clean, damp cloth after wiping it down. This will remove any soap residue that may be left behind.
- Allow the controller to dry completely before using it again.
- This may take a few hours, depending on how wet the controller got.
- Use compressed air
- Compressed air will remove dust or dirt from the buttons and thumb sticks. To clean the thumb stick, press it in one direction and spray compressed air at its base from the opposite side. To clean the other buttons, press them down and spray compressed air into the gap between them and the face plate.
- Use a cotton swab dipped in isopropyl alcohol to clean.
- Dip a cotton swab in isopropyl rubbing alcohol and gently wipe the joystick’s base. Gently wipe the base, pressing the joystick in all directions to expose more of it. Repeat for the other buttons.
While using compressed air, hold the stick in all directions and blast the opposite side of the base in short, quick bursts.
Allow the alcohol to dry completely before inserting the batteries and turning the controller back on. It is best to let the controller sit for a while before reinserting the batteries.
Don’t immerse your controller in alcohol/soap solutions or use harsh chemicals or scrubbers. If you’re using isopropyl alcohol, test it on a small area first to confirm it doesn’t damage the finish.
These simple solutions should fix the problem and get you back to gaming quickly. Dirt and grime can build up on the buttons and sticks and prevent them from working accurately.
Head to the Xbox Accessories app and tap the beaker icon in the bottom right. Now, test your buttons for any issues.
If your Xbox controller still doesn’t work after you’ve followed the previous steps, try the next steps.
Update Controller Firmware
If you have an active warranty, updating your controller’s firmware is a last resort to minimize controller issues. If that doesn’t work, we’ll need to explore more in-depth solutions.
You can update your controller over the air or with a USB cable.
To update your controller, press the Xbox button to open the guide, then go to Profile & system > Settings > Devices & connections > Accessories. Select your controller and look for the “Update” button. If it’s there, tap it and follow the prompts.
All Xbox Wireless Controllers except the original one can update wirelessly. If you have an original, plug in a headset and stereo adapter to turn on the adapter and update the controller with a USB cable.
The adapter requires a headset to be plugged in to turn on.
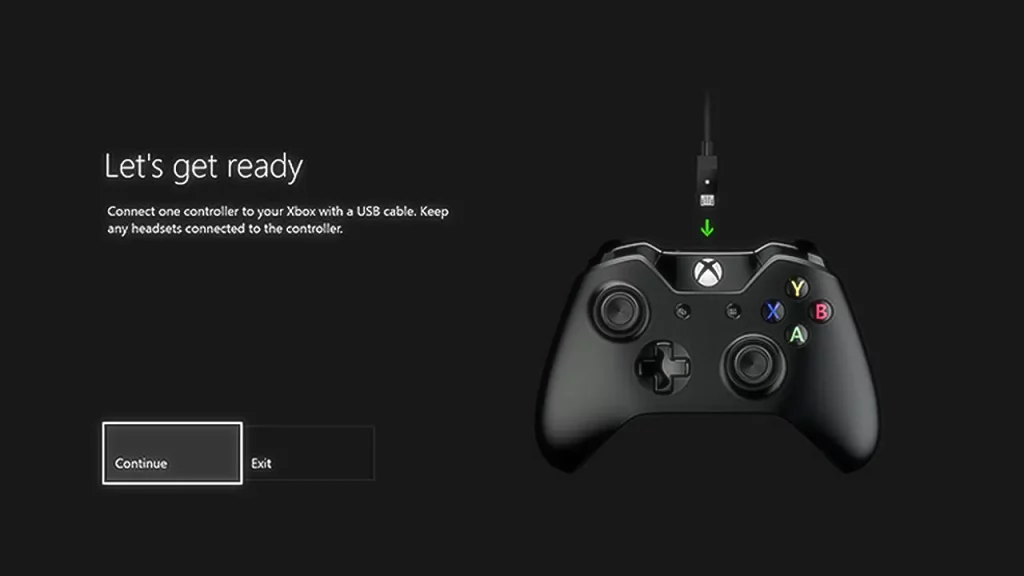
Plug a USB cable into the USB port on the front of your Xbox console. Then, plug the other end of the USB cable into the top of your Xbox controller. Now, on-screen instructions will guide you through the update process.
Follow the on-screen instructions and keep the USB cable connected until the update is finished. It can take up to 3 minutes.
Now go back to the Xbox Accessories app main page and click the lower right “Beaker” icon. Test the buttons for any defects.
If you’ve tried all of these solutions and your controller is still not working, then it may be time to contact Xbox support to request an Xbox controller replacement.
How to Get an Xbox Controller Replacement
Don’t worry about your warranty when following the cleaning solutions we mentioned above. All of these methods are recommended by Xbox support, so you can safely use them to clean your controller without worrying about voiding your warranty.
If you’ve tried all the solutions above and your controller is still not working, you may need to contact Xbox support for further assistance. They will be able to troubleshoot the issue and determine if your controller needs to be replaced.
Once connected with an Xbox support representative, they will work with you to resolve the issue. If they determine that your controller needs to be replaced, they will send you a new one free of charge, provided that it is still under warranty.
Before you contact Xbox support, check if your controller is still under warranty. You can do this by visiting the Xbox website and entering your controller’s serial number. If your controller is under warranty, Xbox support will be able to replace it free of charge.
If your controller is not under warranty, you may still be able to get it repaired or replaced, but you may need to pay a fee. Xbox support can provide you with more information about your options.
How to Check Xbox Controller Warranty
Sign in to your Microsoft account and check your controller’s warranty status under Device coverage. If your warranty is active, start a service order under Info & support.
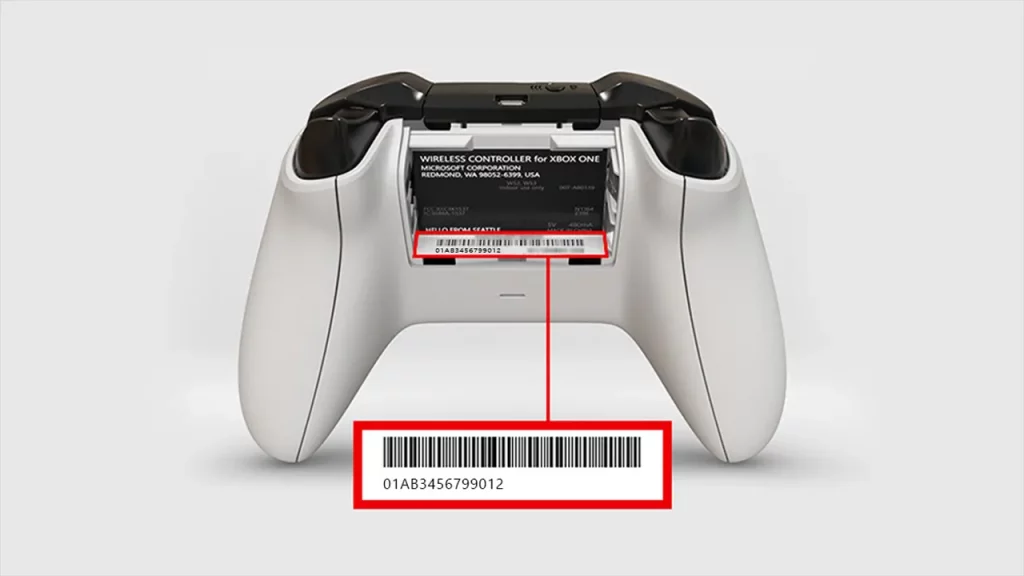
If this controller belongs to someone else and you’ve never connected it, it won’t appear in your Microsoft devices list. You will have to check the warranty on the Xbox Warranty Support page. You can request controller replacement from this page, too. You only need the controller’s 14-character serial number (without dashes).
The serial number is located inside the battery compartment, under the barcode. However, the Xbox Elite Wireless Controller Series 2 serial numbers are on the back of the controller due to the fixed rechargeable battery.
US customers can get further in-person support at a participating Best Buy Service Center.
If your controller is no longer under warranty, you can purchase a replacement from any store or online. But if you don’t want to buy a new controller, you can try one last step. It’s time to safely disassemble your out-of-warranty controller to clean the inside and possibly repair it.
What are the Options for Repairing an Out-of-warranty Xbox Controller?
Here are some options for repairing an out-of-warranty Xbox controller:
Via Microsoft
- Microsoft offers out-of-warranty support for Xbox controllers for a fee. You can contact Microsoft support online or by phone.
- Microsoft offers a device service for Xbox controllers, which allows you to send your controller to Microsoft for repair. This service is more expensive than the out-of-warranty support option, but it is also more comprehensive.
Via Local Repair Shops
- Many electronics repair shops can fix Xbox controllers. Before you have the repair done, be sure to get an estimate.
- Some gaming repair shops specialize in Xbox controller repairs and may have more experience and expertise than general electronics repair shops.
Self Repairing
- There are many repair kits available online that contain the tools and parts you need to repair an Xbox controller. However, self-repair is not recommended unless you are comfortable with electronics repair and have the necessary skills and tools.
Here is a link to the official Xbox video on how to disassemble, clean, and even repair your Xbox controller. The video is for the Elite Wireless Controller Series 2, but the process is very similar to the standard Xbox wireless controller:
I hope this guide helped you to fix your Xbox controller buttons. If you need more help with your console, check out our dedicated Xbox section for more tips & tricks.