With the launch of the new WWE 2K23, players are wondering how to upload custom logos to the game. If you too are one of them then you’re at the right place. The custom logos option featured in 2K22 gave the players an opportunity to showcase their creative side. Players on Youtube and Twitch could add their logos to the superstar attires and give them a personalized look. In this guide, we will tell you how to add logos to the game.
WWE 2K23: How to Upload Custom Logos

First of all, make sure you have a stable internet connection before starting the process. If you are playing on a console like the PlayStation or the Xbox, make sure your 2K account is linked to it.
To upload Custom Logos or images in WWE 2K23:
- Launch the WWE 2K23 and agree to all the terms and conditions like EULA at the start of the game.
- Then, leave the game and go to WWE2K’s official website.
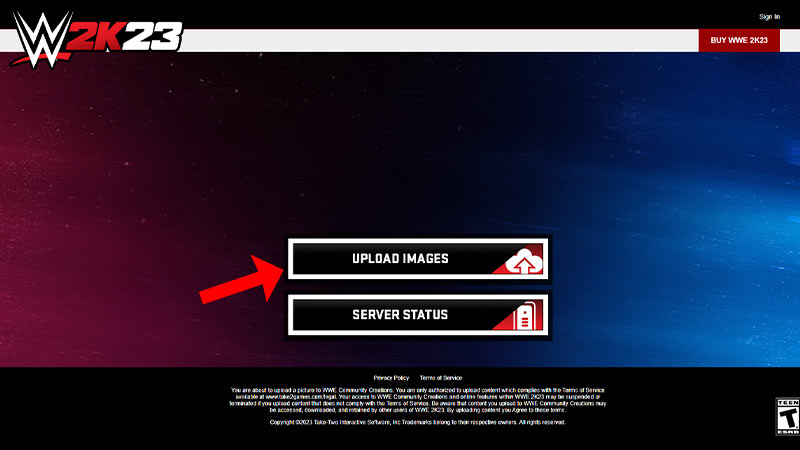
- Select the “Upload Images” option.
- Then, select the platform you’re playing the game on.
- In the new window, sign in to your account. (You can skip this step if you’ve already signed in.)
- On the “Upload Images” page, make sure you’ve selected 2K23.
- Then, select from a list of dimensions based on your custom logo.
- Locate the file and upload it to the site.
- Then, wait for the logo to load and hit the “Upload Now” button.
- Once you’ve followed these steps, go back to the game.
- Then, head over to the Online tab and select “Community Creations”.
- Go to “Image Manager” and your logo will be there.
Now, you can download the logo and use it on multiple options like Superstar attires, arenas, championships, and more.
That’s all from us on how to upload Custom Logos in WWE 2K23. While you’re here, make sure you visit our Guides section for more content like How to Drag an Opponent and Locker Codes.

