Are you a fan of a movie/game character and would love to have that custom skin in Minecraft Education Edition? You will need a Minecraft skin compiler for this purpose. If you are not sure how to go about it, follow the steps mentioned below to get any custom skin of your choice into your game easily.
How to Use Minecraft Skin Compiler?
To import and get custom skins into Minecraft Education Edition, you need them to be in a particular format. Here’s how to convert your PNG file into the mcpack file.
- You can head to mattheffnt.github.io which is the custom Minecraft skin compiler.
- But first, you need a custom skin. You can select any one of your choice from Minecraftskins.net or other similar sites.
- After making a choice, click on the Download button to get the skin in .png format.
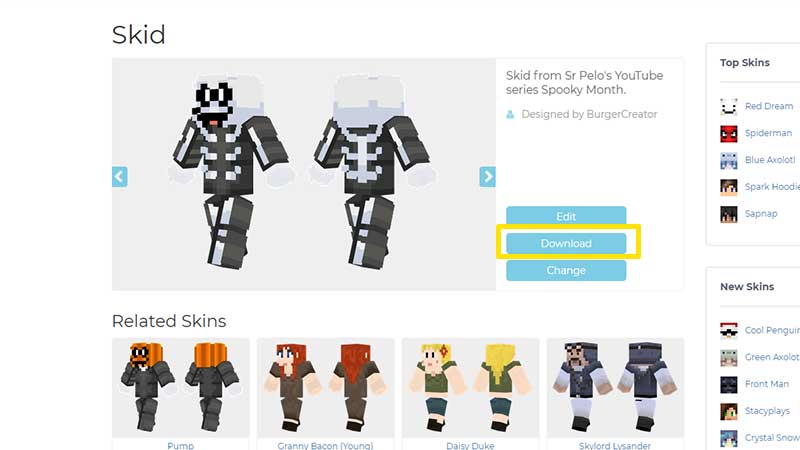
- Check the image from your Downloads if it’s downloaded properly. It will appear in an ‘unpacked/unwrapped’ format.
- Now, visit the Minecraft Skin Compiler site and enter the details in the form.
- You can name the skin whatever you want, add a skinpack name (you can keep it same as the name) and add a version number (1.0).
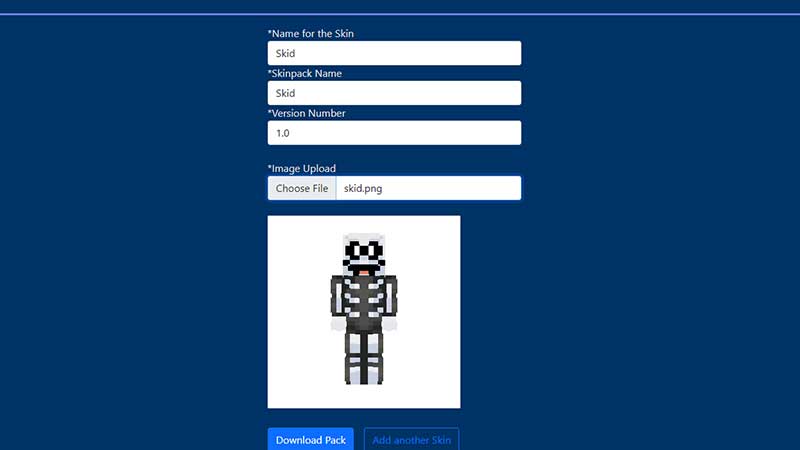
- Choose the file as an image upload.
- Click on Download Pack.
- A filename.mcpack will get downloaded.
- Double click on the .mcpack file and Minecraft Education Edition will open up.
- Wait for the import to finish.
- As soon as you see the Successfully imported ‘filename’ message, click on the hanger icon under your character.
- Scroll down to choose your skin and click on it.
- Hit Confirm and that’s all you need to do.
Hopefully, this helped you import custom skins into Minecraft Education Edition with the help of Skin Compiler. For more Minecraft guides, be sure to explore more tips and tricks on Gamer Tweak!