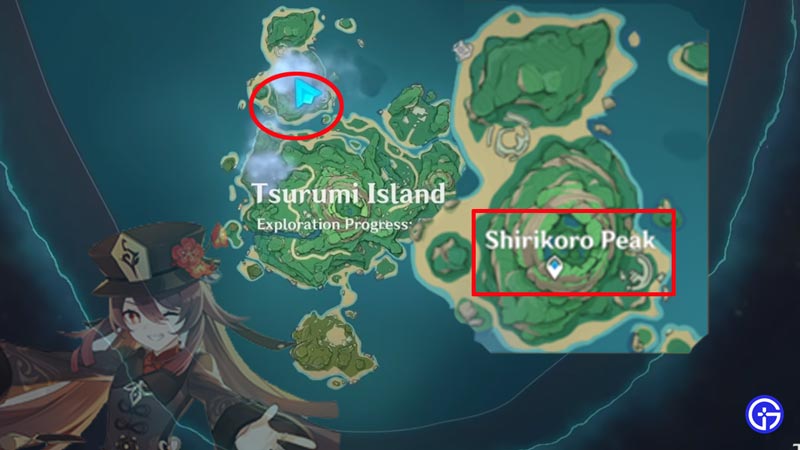
Shirikoro Peak is a mist-covered region in Tsurumi which you’ll need to traverse in Genshin Impact to complete some puzzles in the latest update of the game. This quest is a bit tricky and could take a while to understand. To help you get through this easily, we’ve crafted a complete step-by-step guide to complete it.
How to Complete the Shirikoro Peak Puzzle Challenge?
The Shirikoro Peak Puzzle consists of a total of 5 different challenge puzzles you need to solve in order to complete. These 5 puzzles have different segments to solve them. As mentioned above, these are easy to confuse the players. To clear out the confusion, mentioned below are all the different segments in order. We’ve crafted this specific order since we understand following each puzzle separately could prove to be intimidating for newer players. Follow the sequence below and you’ll complete the Shirikoro Peak Puzzle Challenge in Genshin Impact no time.
Shirikoro Peak Puzzle Tasks in Genshin Impact
In order to break it down, this is the pattern you need to follow.
- Meet Ruu.
- Make the first perch offering.
- Guide 3 Seelies to their courts.
- Drain out the water from the submerged region.
- Collect the first featherhead through the cave.
- Defeat the enemies.
- Complete the first stone relay puzzle.
- Defeat the Ruin GuardCollect the second featherHead through the next path.
- Guide 3 Seelies to their courts.
- Drain out the water from the submerged region.
- Complete the stone relay puzzle.
- Enter the next path.
- Collect the final feather.
- Head back to the ancient Perch.
- Make the offerings.
Now that you know the order you need to follow, let’s get into detail and see how you can easily complete the Shirikoro Peak Puzzles Challenge.
The Three Feathers
Your arrival at the Island of Tsurumi requires you to visit Shirikoro. Your main aim here is to collect 3 feathers which you’ll only get once you complete the puzzles specific to each. These feathers are what you need to offer to the Perch aka the Ancient tree. What makes these feathers hard to find is the fog that has enveloped the island. An important tip to remember here is to include a character with electro element. This is because you’ll need them to activate stormstones. These Stormstones when activated help you find your way through the foggy conditions around the Shirikoro Peak Puzzles. If you’re out of an activated stormstone’s range for a long duration, the mist covers the entire region. This is a game-intended “bug” that turns the entire screen white.
The Perch Offerings
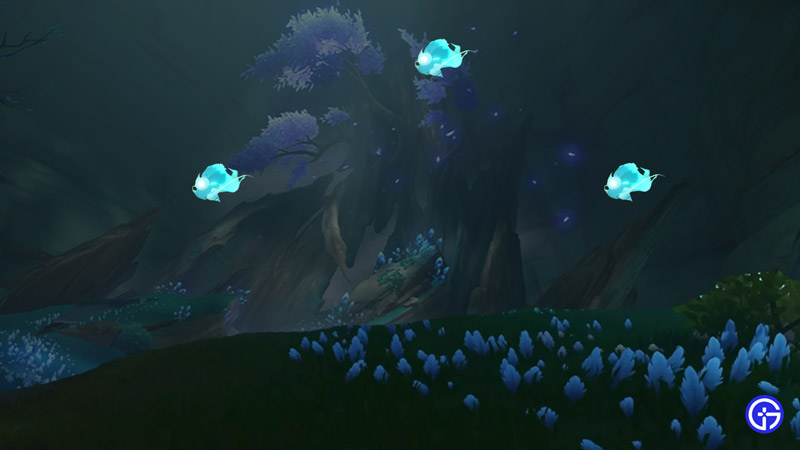
When you first arrive at Shirikoro Peak, you’ll notice a Seelie whom you need to follow (rather, it follows you ). Over here you’ll find Ruu who’ll reveal a quest to you. This will ask you to make your way through the mist to make an offering of the aforementioned 3 feathers to the Ancient Tree aka the Perch behind Ruu. While you can come and offer all 3 feathers and make the 3 offerings separately, it makes no sense to. Therefore, simply complete the entire puzzle set and only then come back and make your offerings. This will not only save you time but also- SAVE YOU TIME! You will however need to make the first offering by simply touching the Perch. Once you’ve done this, you see a pretty Japanese-y breathtaking animation of 3 orb-like spirit fairy thingies encircle the perch. This apparently “revives” the ancient perch.
Seeking the Seelies and Draining The Water (Part 1)
You’ve made your first offering. Now, In order to get to the other two offerings, you’ll need to drain out the water and clear the submerged region. This is because the feathers are chilling probably and plotting how to make you run around. To drain the water and get to the feathers, You will have to guide three Seelies to their courts right beside the first perch. If you’ve followed our stormstone tip, locating them shouldn’t be hard. The first one is usually right beside you, a second Seelie sits atop a branch behind Ruu and the third Seelie is just beside the creek point bough. Now, remember that you can only guide a single Seelie at a time. Patiently guide them to their courts which are in this case, on Ryuu’s right. Once you’ve guided them to their positions, a chest appears. Collect the rewards and you’ll notice that a cutscene plays where the water is seen being drained. Head on down below and look for the feathers.
The Stone Relay Puzzle (Part 1)
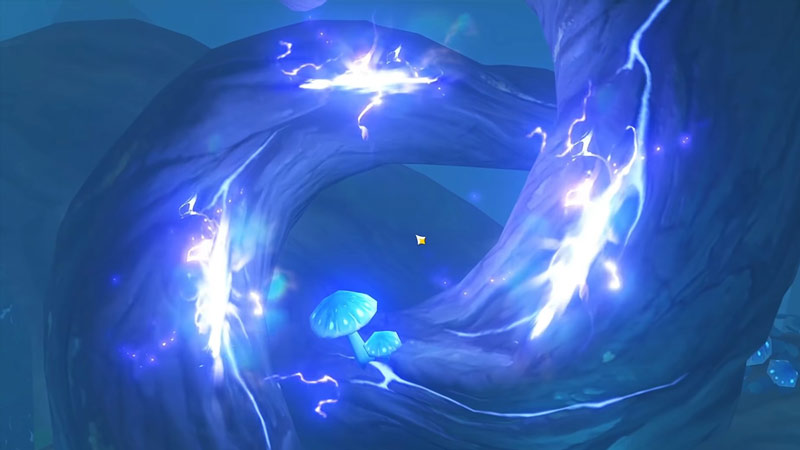
The second level has been drained and is no longer submerged. You can now head down where you’ll find all three feathers huddled up just at the base. Proceed to collect them. You can do this by simply walking towards them. While you collect the first feather, the other two move out past a cob-webbed entrance inside a cave. Over here, some enemies will spawn. Defeat them and proceed towards the right entrance. It’s here that’ll need to correctly place Thanos colored diamond-like objects called relay stones in a pattern that connects the beam to all. In order for the prism beam to connect to the last diamond and complete the path, you’ll need to work your way with patterns. You can try this out and it shouldn’t take much time. Do this until you notice a chest appear. This will now let you toggle the switch just in front of the entrance to another cave-like doorway. It’s here that you’ll encounter an elite enemy
The Ruin Guard and the Second Feather
Open up the entrance to the doorway by toggling the switch. You’ll now come face to face with A Ruin guard. Defeat him and continue on towards the path. It’s here that you’ll collect the second feather. As you collect it, you’ll find the third feather sitting over the cliff. You need to approach it but as soon as you do, it floats away as soon as you try to come close. You’ll need to complete the final remaining puzzle to get this feather and make your offering to the Perch.
The Chronicles of Shirikoro Peak: The Feather, the Seelies and the Stone Relay Puzzle (Part 2)
The third feather proved to be the cheekiest to chase. Once again you have to guide 3 Seelies to their courts. you’ll find the first one inside a pretty cool Batcave, the second is atop a tall stone pillar and the final one hovers over a hill-like structure in the area. Guide each one to its court. Once again, patience and Seelie-sitting are pivotal. Once you’ve completed this and led all 3 Seelies to their respective courts, another chest appears. You’ll be able to activate the glowing stone switch in the center that drains the water and clears the submerged region. Subsequently, you’ll come across yet another relay stone puzzle. This is similar to the first one but is more spread out. Simply connect the beam and power the main diamond while making sure everything’s connected. After solving this, you get to another entrance. You can toggle the switch to open up the doorway to it. (Where have we seen this before?). It’s here that you’ll discover the third and final feather. Now simply navigate back to where Ruu is and touch the ancient tree once more to make an offering. Once done, you’ll notice how the tree blossoms with bluish neon mythical leaves that are a sight to behold.
This concludes the Shirikoro Puzzle Challenge in Genshin Impact. We crafted this guide in a very intricate manner to ensure you don’t miss out or feel perplexed. It’s recommended and we urge you to traverse the region once and check out the points since you can still be running in circles and feel lost. We hope this guide was of assistance to you. If you haven’t gotten to this point in the game just as yet, check out how to get to Inazuma in Genshin Impact through this guide.