Destiny 2 Seasons for Arrivals is out and everyone can take part freely. Prophecy Dungeon is the first challenge you will play. Here is a Destiny 2 Prophecy Dungeon guide that will help you to understand every aspect of this challenge. What to do? How to unlock new paths? Boss fight tips and more. If you are new to the challenge and looking for more details on what actually is Prophecy Dungeon then here is a detailed Destiny 2 Seasons of Arrival tips.
Destiny 2 Prophecy Dungeon Walkthrough
To unlock the Prophecy Dungeon challenge you will need to be on +1040 Power, enemies you will face will be around +1060 light level. So you will need to level up enough to deal with the knights in this challenge.
How to start Prophecy Dungeon?
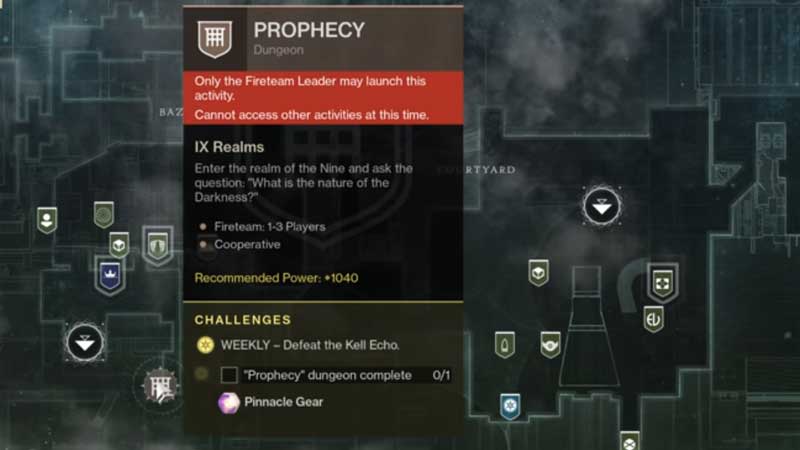
On the Map click on The Tower and look on the left corner for Prophecy Dungeon. You will see the info about the objective, where you can play in a team of one to three. You will have to defeat Kell Echo and you can unlock a Pinnacle Gear by completing the challenge. Once you unlocked the Dungeon, you will spawn on the Drifter’s ship. Walk towards the portal and this the beginning of the first wave in a mysterious cave type region.
First Challenge – Disable two pillars
Destiny 2 Prophecy Dungeon’s first wave is to deal with some enemies in a cave type region. There are dark and light areas in this place, also the path to get out of this place is completely locked. So here is what you have to do to win this part.
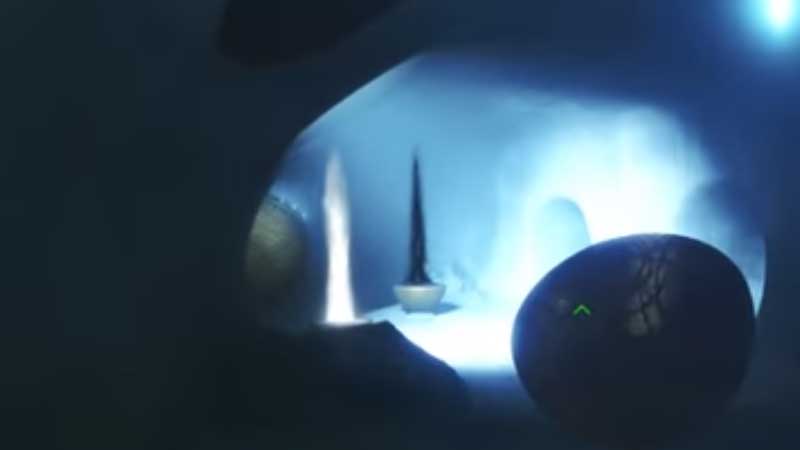
You can see two pillars on half-sphere placed at the end of the cave. One of them has a pillar of light and the other one has a pillar of darkness. On killing, knights standing in the light area will make them drop light nodes. Similarly killing them while standing in the shadow will make them drop dark nodes.
Collect 5 Light Nodes and 5 Dark Notes and interact with the pillars to disable them. This will unlock the path ahead. Each knight killed will drop 3 nodes. As soon as you collect 5 nodes you will see the screen will switch to third-person mode. This is an indicator that you have to disable one of the pillars.
If you are carrying 3 Light nodes and killed an enemy that drops dark nodes, the light one will be completely replaced by the dark ones. It means you will lose the light nodes, so it is better to follow one single path. First, collect only 5 Light Nodes and disable light pillar on the left and then collect 5 Dark nodes and disable the dark pillar on the right.
Second Challenge – 4 Pillars & The Boss Fight
Turning off both the pillars will unlock the path to an entirely new region. It is a small arena over a sphere. There are rings that shifts which changes the reflection of light on the ground. The challenge is similar to the above one, but there will be four pillars this time. You will have to disable all to unlock the path ahead. With this challenge, you will face the first boss of Destiny 2 Prophecy Dungeon.
Knights will be all over the place, just follow the same instruction of killing Knights while standing in light to collect light nodes. Disable two pillars of light and two pillars of darkness you will face the boss. Disabling every pillar will trigger a shift in the rings, that will change the light and shadow on the ground.
It is a small place to fight, use super to take down multiple enemies. There are some massive columns around, you can climb up if you find yourself surrounded. Once all pillars are down, the boss will enter the battle. It will be a little tough to deal with this one, but make sure you kill the boss. In case you die and lose this fight everything will start again. All four pillars will be restored and you have to again disable them and then face the boss.
Third Challenge – Find and Destroy Taken Blights
After killing the boss stand in the center of the area over the purple light. You will sink down to a new area, a kind of dessert. This a big area, use your sparrow to follow the ring of lights. The rings will take you to Taken Blights, destroy it, and kill the enemies.
Destroy the blight and look for wisp in the center of the ring. Follow it for your next challenge. In between you will also deal with micro bosses, the objective is to destroy the blights and check the-wisp in the center of the ring.

After destroying two blights look for a glowing pink light pillar, it is easy to notice. Just look in the direction of the Toland wisp or use your sparrow to drive near. This pink light pillar will lead you to a door that will take you to the fourth encounter of Prophecy Dungeon of Destiny 2.
Fourth Challenge – Follow the Toland Wisp
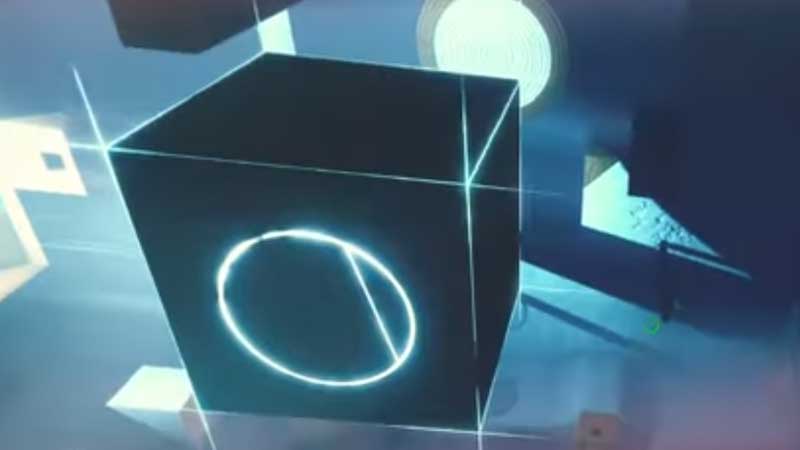
The door leads you to an upside-down arena with teleportation portals in the center of the building. You can instantly switch the orientation of this new arena by teleporting around using the black cube with symbols. Wherever you spawn it will become the default bottom of the room. For example, if you teleport to the top it becomes your new bottom.
This challenge is tricky, the mechanics is the same farming nodes by killing knights and disabling the light and dark pillar. There will be many pillars around, and the task is to figure out which one to disable?
Follow the Toland Wisp, it will point to a circular platform. The correct pillar is right below the-wisp, if you are unable to access jump and switch the room orientation. Gather the nodes and destroy the pillar right below the Toland Wisp. There can be six sides of this room, which means you will have to disable three light and three dark pillars. Snipers will be the real pain in this part of the Prophecy Challenge.
Sometime you will have to use the teleportation cube multiple times to follow the wisp and locate the correct pillar.
Fifth Challenge – Fight Two bosses: Once you are done with the cube arena challenge use the teleportation cube once again that will take you a darker part of the arena. You will fight two bosses, kill them and this part of the Prophecy Dungeon challenge is completed. Use the same door to exit you used to enter this arena, you will be back in the massive desert type area.
Fifth Challenge – The Rainbow Roads, 3 Fallen Captains & Kell Echo.

Outside right in front, you will spot a mysterious figure. Follow the Taken, and keep attacking. He will lead you to another door, this is something you will see for the first time in Destiny 2. Long ribbons of rainbow roads scattered around with floating triangular objects. The floating objects are your fight area, jump into them, and kill the enemies.
The problem is if you use the rainbow road you might fall and die. It is best to reach near and jump over the rocks to enter the arena. At the very end you will see a lot of rotating squares in a line, stand in the middle and you will be teleported to the final boss fight.
Prophecy Dungeon Final Boss Fight:
The final boss fight is divided into two waves. First, you will deal with three bosses who will be immune to damage, and second, you will be in a massive tunnel. You have to chase the boss and defeat him.
How to defeat three Immune Bosses?
After completing all the challenges you are in the final part of Prophecy Dungeon, facing the Kell Echo inside a giant triangle. Similar to the cube challenge you will have to switch the room orientation by teleporting around. This is a big place, as soon as the challenge starts Taken Fallen Captain will spawn in three different corners of the arena. Also, there is a safe zone, whenever you want to break stand in the safe zone to plan your next strategy.
All three will be immune, and to destroy them you will have to disable the pillars near them. Grab one of the corners and disable the pillars of light or dark. Without disabling the pillars you cannot progress to the final stage. Spot a boss and check the pillar on his right. Then kill the knights and disable the pillars. Continue till you get all three.
Tips to defeat Prophecy Dungeon final boss?
After defeating all three bosses stand in the center to teleport to a new room where you can now damage the bosses. Your attacks will destroy their health, but there is a catch. Here are three important things to remember.
- Keep your Dark Entropy levels low
- Avoid the Snipers
- Use the Cover
- Dodge the blight to avoid getting teleported away from the boss
In the fight check the left corner part of the screen for Dark Entropy. This will build up and when it reaches 10 you will die. Dark Entropy rises when you are far from the boss. This forces you to go near and put in the range of his attacks. Use the covers around the platform, and shoot.
The strategy here is to keep chasing the boss to keep Dark Entropy low, avoid the snipers in the tunnel and shoot to destroy the boss’s health. If you die you will respawn far from the boss, again you will have to make your way close. Sniper will block your way and this makes the challenge tougher. Use the covers on the platform to avoid the boss attacks.
Second important thing is the blight attack. The boss will release a blight which will chase you in a single direction. Dodge it all costs or it will teleport you away from the boss. Again you will have to travel all the way, face the snipers and knights. Spawning to a far distance also increases the Dark Entropy level. So avoid the blight at all costs.
The safest strategy is to a defensive game, this arena is tough and you are dealing with the final boss. So stay in cover and then attack. Try to attack from behind and keep moving. Shoot the boss and then change your position. Do not stay at the same place for a long time. The best weapon here is the grenade launcher. Shoot and run away, the weapon will do its work.
Finally when the boss will disappear at the very end of the tunnel. Stand on the purple glowing area and you will teleport to the previous room. Where you face three bosses in corners who were immune to your damage. By dismantling the pillars you will be teleported back to the tunnel region and the boss fight continues.
After repeating this process multiple time you will be in the final phase of Destiny 2 Prophecy Dungeon. Defeat the boss and grab your final reward.
This is how you can complete Destiny 2 Prophecy Dungeon challenge. It is long and has similar challenges. Follow the step by step process in the walkthrough to complete it and unlock your reward in the end. Another way to get free rewards in Destiny 2 is finding XUR who appears once in every week.