Did you know that your Switch has a secret hidden web browser? When you turn on the device, you will notice the absence of a web browser and you cannot download a browser app from the Nintendo store as well. This can be frustrating if you are using the Switch and suddenly want to Google something real quick. So, in this guide, we will take a look at how to get and use Google on Nintendo Switch with the help of a little trick.
How to Get Google on Nintendo Switch (2024)
To access Google, you have to play around with a few settings. Here’s the step-by-step process to get Google on your Switch easily.
- Open up the main/home screen of your Nintendo Switch.
- Select the System Settings which is right next to the Power button.
- Select Internet > Internet Settings by pressing the A button.
- After searching for networks, select the network you are using.
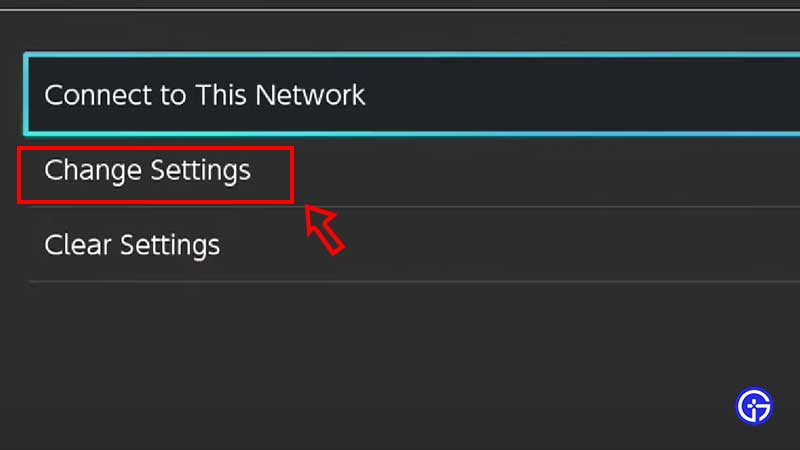
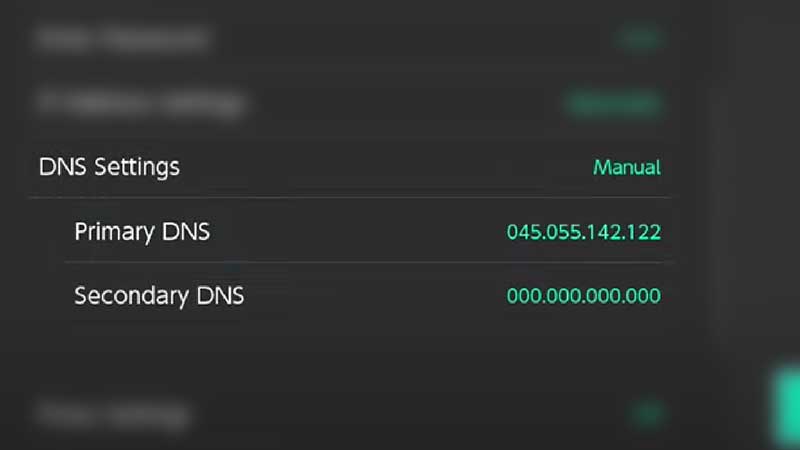
- Scroll to Change Settings and then find DNS Settings.

- Change it from Automatic to Manual. Confirm it by pressing ok.
- Select Primary DNS and change it to 045.055.142.122 and press + sign.

- Save these settings and then Connect to This Network.
- You will see the ‘Connecting to the Internet’ message.
- Soon, a ‘Registration is required to use this network’ message will be shown. Tap on Next.
- Now, you should see the DNS screen where there’s a Continue to Google button. Click on it and you should be able to see the Google webpage.
- Type something and test it out.
To revert the DNS settings and turn off the access to the web browser on your Nintendo Switch, go Back to the Internet Settings screen. Choose the network and Change Settings. Then under DNS Settings, change it from Manual to Automatic. Confirm by pressing the A button for OK. And Save it by clicking the Save button. That’s all there is to it – your settings will be saved.
Hopefully, this helped you find out how to get Google Web browser on Nintendo Switch. For more coverage about the Switch and Switch games, be sure to check out our guides on Gamer Tweak.

