Apple releases major iOS generation updates every year, which are no doubt highly anticipated. Bring significant UI design changes, additional features, and improvement in security et cetera. Maybe just the tip of the iceberg, but mind you the ocean below is more deep and dark. There are a few good reasons why people are downgrading from iOS 17 to iOS 16 and such practices are very popular in recent times.
This is seen because although the new iOS offers exciting new features, compatibility issues with certain apps or performance problems on older devices are a common occurrence. Whatever the reason, downgrading to iOS 16 is a good option if you are looking for a familiar and stable user experience.
How to Downgrade from iOS 17 to iOS 16
Before we begin, it is important to note that Apple officially does not support iOS downgrading, and It is only possible to downgrade from iOS 17 to iOS 16.7 only, with iTunes due to the Apple signed aspect.
Things you need;
- Internet Connection
- MacBook / Windows Computer
- The latest version of iTunes is installed on it.
Before you start – Create a local backup
Make sure to back up your Apple device just in case something goes wrong, and your data is erased, which will happen as you are downgrading, you’ll have it back with you. To do so, follow the below-given instructions carefully.
- Connect your iPhone with iOS 17 to your Mac or PC.
- Now, open the iTunes App on your Mac or PC and click on your iPhone icon.
- In Summary under the Backups heading, click the Back Up Now button.
- Now, iTunes will create a backup of your data.
Method 1 – Using iTunes
- First, download the iOS 16.7 IPSW, by selecting your iPhone model from ipsw.me website. (Get only signed iOS, since they’re verified and signed by Apple).
- Next, disable Find My on your iPhone from Settings> Find My > Find My iPhone and toggle it off.
- Now, connect your device to the computer and launch iTunes on it.
- Further, select your device from the sidebar or the top-left corner of the screen.
- Enter Recovery mode on your iPhone. To do this; first quickly press and release the volume up button, then the volume down button. Finally, press and hold the side button until you are able to recovery mode screen appear on the iPhone.
- Now, in iTunes, click on the “Restore iPhone” (or iPad) button while holding down the Option key (Mac) or the Shift key (Windows). Further, browse and select the iOS 16.7 IPSW file you just downloaded and follow the on-screen instructions to complete the restore process.
Method 2 – Using Tenorshare ReiBoot
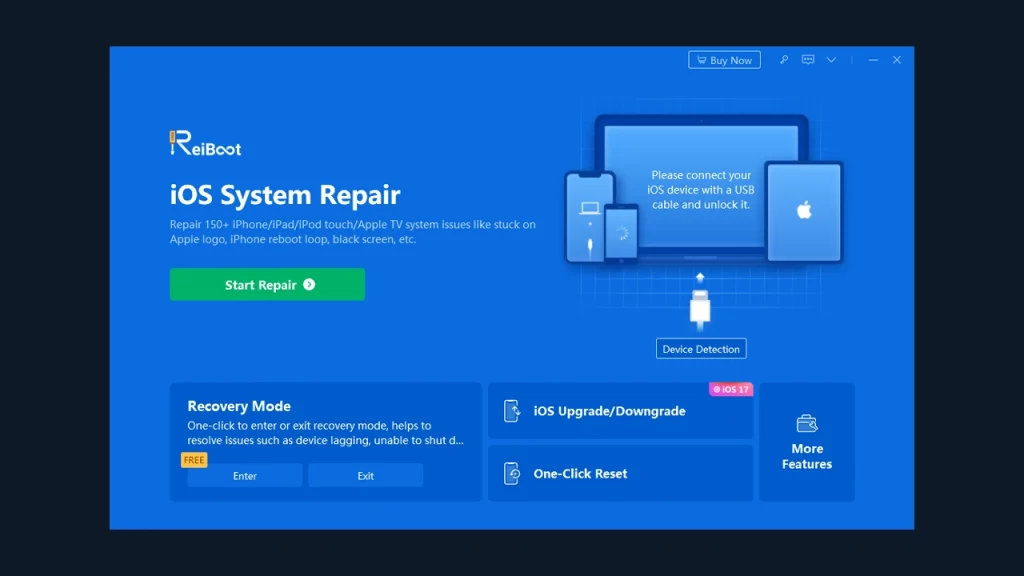
- First, download the Tenorshare ReiBoot on your Mac or Windows.
- Now, connect your iPhone to your computer.
- Launch the app on the computer and select the Downgrade option.
- Next, select the Downgrade button located at the bottom of the screen.
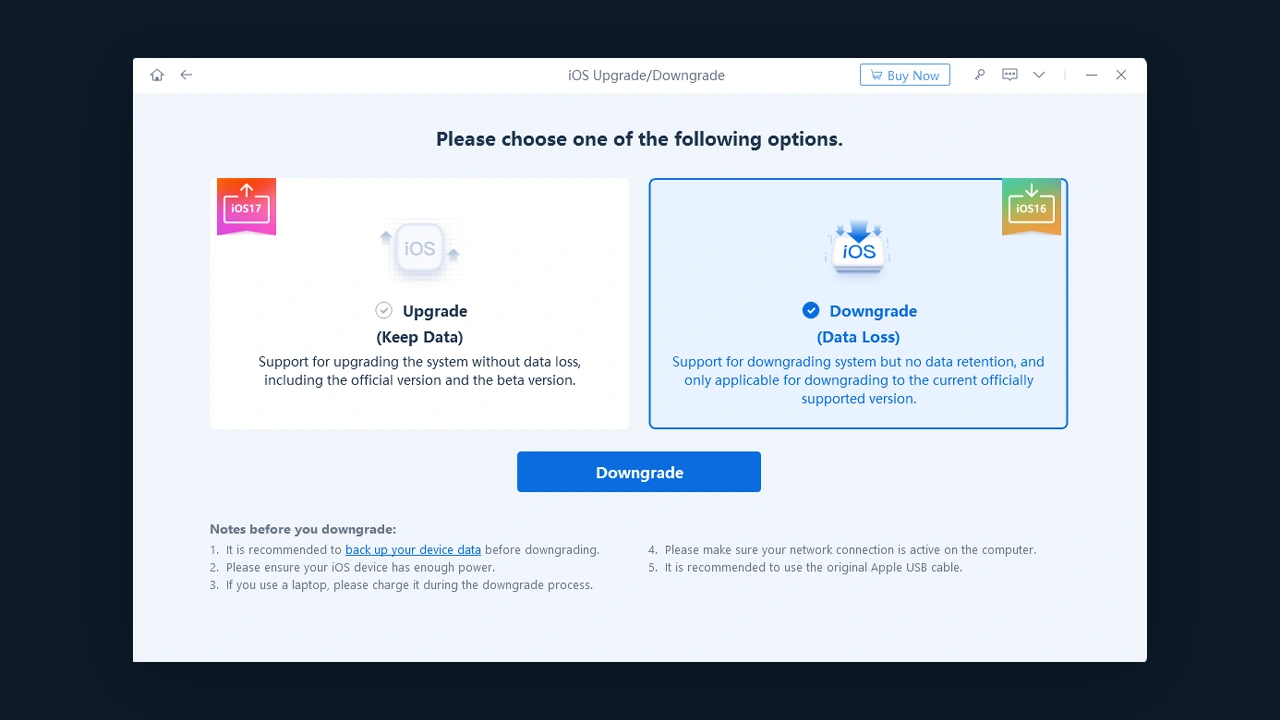
- Further, download the firmware package for the desired i.e iOS 16.7 downgrade.
- Once the process is completed, your device will be downgraded to the older version.
That’s everything you need to know about how to downgrade iOS 17 to iOS 16 on your Apple Device.
If you find this guide helpful, check out more such tips in our Tech section completely dedicated to how-to and other informative articles from the tech world right here on Gamer Tweak.