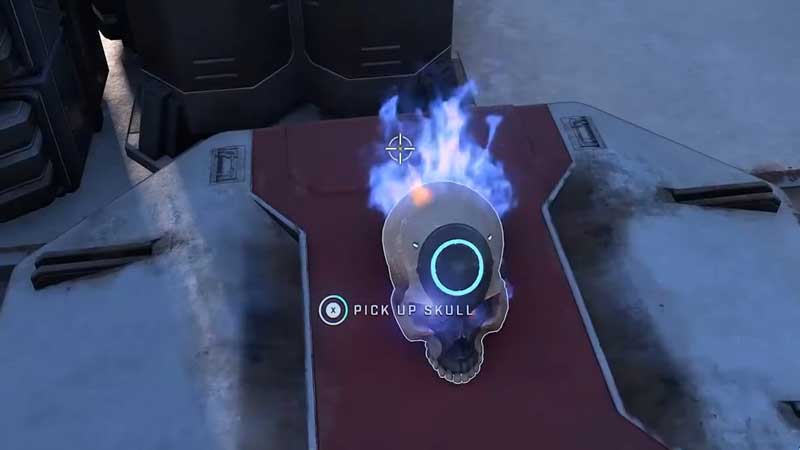
When playing Halo Infinite, you will have the opportunity to find skulls at different locations. Doing so will unlock amazing gameplay mutations. This makes finding the skulls quite important. If you are one of the many who are wondering where these items are located across the game, we have got just the guide for you. Here, we will walk you through all you need to do in order to get to them, along with the different things they unlock.
Halo Infinite All Skull Locations – How to Trigger & Unlock
Boom Skull Locations in Halo Infinite

You will find the Boom Skull in Mission 1 – The Banished Warship Gbraakon in Halo Infinite. This skull provides twice the explosion radius as an effect. Once here, you need to head to a narrow room with two floors and a few hallways. You will find this room after the room with a broken elevator and an AR projection.
Next, simply walk towards the wall that has rising block platforms. You should spot the said platforms towards the right of the room. You need to get onto the moving block in the middle. Do this from any floor.
Once on the moving platform, you need to move upwards and cross over to the secret spot where the skull is hidden. Once you acquire the Boom Skull, you can leave by getting back onto the moving platforms.
Cowbell Skull Locations in Halo Infinite

You will find the Cowbell Skull in Mission 2 – Foundation in Halo Infinite. This skull provides enhanced acceleration from explosions as its effect. Its location is in the room right next to the elevator and memory. Once you get here, you will find a hallway with a window. All you need to do is keep going ahead.
When you make your way into this hallway, you will come across some Grunts and Jackals. You need to kill them, and then use the Grappleshot to hoist yourself up one of the initial two pillars. Now, turn around and face the same hallway you came from and then look upwards.
Upon conducting a brief scan, you will be able to see the highlighted outline of a skull in a support beam above the hallway window. You will need to use the Grappleshot to jump all the way to the top to pick up the Cowbell skull. Be careful when you do so, as the climb can be quite tricky.
IWHBYD Skull
The location of the IWHBYD skull is The Tower in Halo Infinite, in Island 1 – Recovery. This skull provides enhanced common rare combat dialogue as its effect.
In order to get the IWHBYD skull, you will need to climb right at the top of the Tower. If your Grappleshot twice to unlock the 40% shorter cooldown, you will find climbing way easier. Additionally, a Wasp or Banshee will make the climb even easier. Once you take care of the Grappleshot upgrade, you can climb on the side of the tower. When doing so, make use of the support beams to climb.
Upon making it close to the top of the tower, you will need to shoot the Grappleshot at a slight angle in order to get to the extreme top. Once you face the rim of the Tower’s edge, use the Grappleshot to make it to the top finally.
You will find the IWHBYD skull in the middle of the roof, on top of a small platform.
Blind Skull
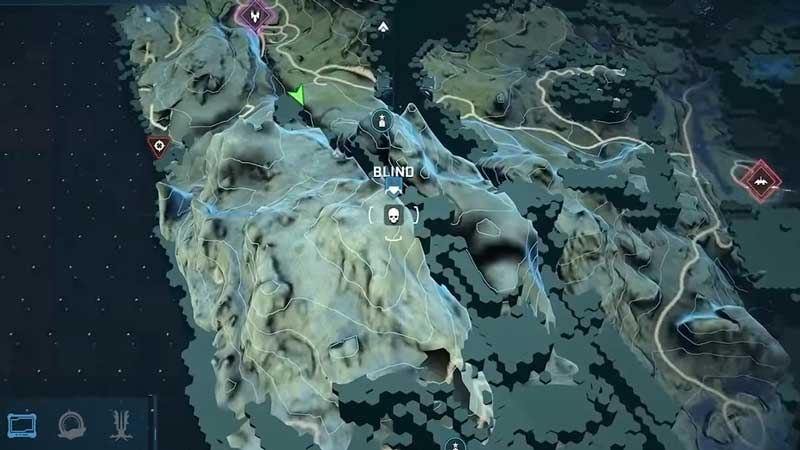
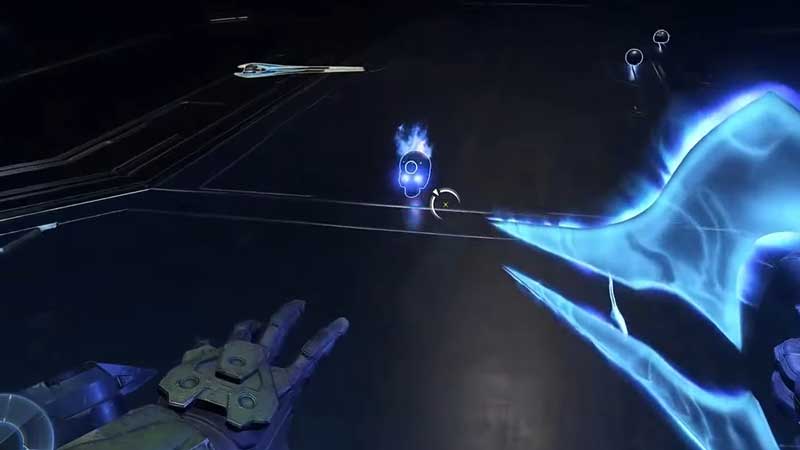
Just like the IWHBYD skull, you will find the Blind Skull in Island 1 – Recovery in Halo Infinite. You will find the Blind Skull between two southern mountains on the first landmass in this area.
In order to get to it, you need to first approach the mountains on the western side. When you are halfway there, you will find something that resembles a falling pillar. Upon passing it, you will find dead Marines glowing in bright blue gunk below.
Upon heading towards the first of the Marines with your rocket launcher, you will come under attack by a Banished ship. To dodge this attack, you can seek shelter in the rocks nearby.
Now, head over to the corpse of the second Marine. Towards the right of this corpse, you will see a blue light. The light will be a reflection bouncing off a silver column wall in the cavern. You need to jump down there.
Once you do so, you will hear mysterious noises. Upon moving further, you will notice the presence of another blue light. You need to get to this light with the help of your Grappleshot. Doing so will get you the Blind Skull.
Catch Skull
The location for the Catch Skull in Halo Infinite is Island 2 – Excavation (The Northern Island Landmass) This skull results in enemies throwing and dropping more grenades than usual as an effect.
To get this skull, you will need to look for two circular roads towards the northern side of the northernmost island. The southern island will have three Brutes with heavy armor, along with two Hunters.
You will need to be wary of the Banished Hunters, as they are quite dangerous. We recommend you use ranged weapons in order to have some chance against them. Taking something like a Ghost or Brute Chopper will inevitably result in your death.
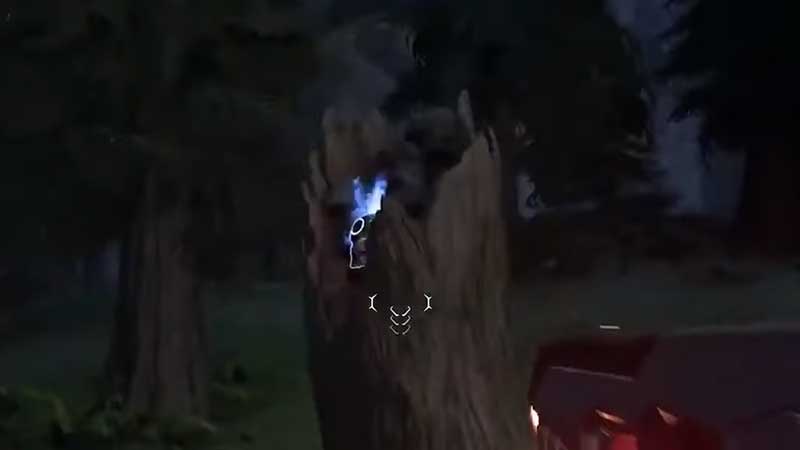
Upon successfully killing the Banished Hunters, you can steal the skull. This skull will be inside the tree stump that was formerly guarded by the Hunters.
Fog Skull
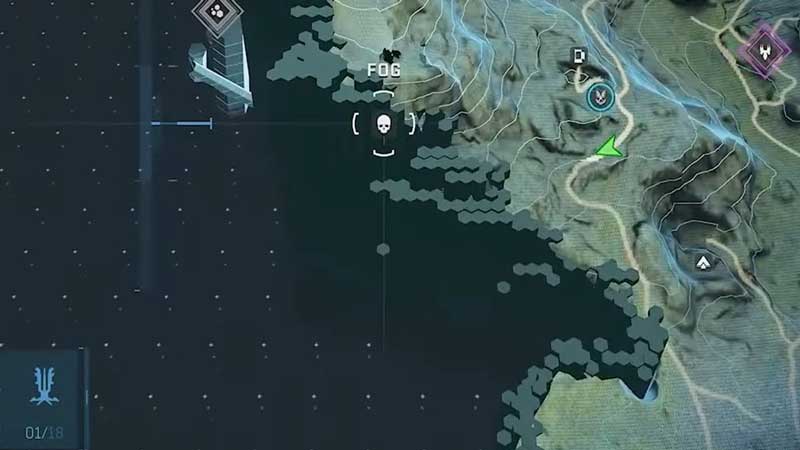
You will find the Fog Skull in Island 2 – Excavation. This skull guarantees the disabling of the motion tracker radar as its effect.
You will find this skull towards the west of FOB Alpha. While having the Wasp when finding this skull is recommended, you can also make do with a Grappleshot cooldown to quicken the process. Move along the cliffside, and then follow the road of the hexagonal pillars.
Once you make it under the mountain, you will find a doll on the floor. Scan this doll and then look up. Now, you will be able to see some weapons and grenades highlighted above you. You will need to make your way here with the help of the Grappleshot to get onto the pillars. You need to do this until you get to the platform’s opening. If you wish to, you can also use the Wasp to carry out this step.
You will also find another entrance on the other side of this platform. Here, you will find a few grenades along with a sniper and pistol. You will find the Fog Skull on top of a pile of armor.
Famine Skull
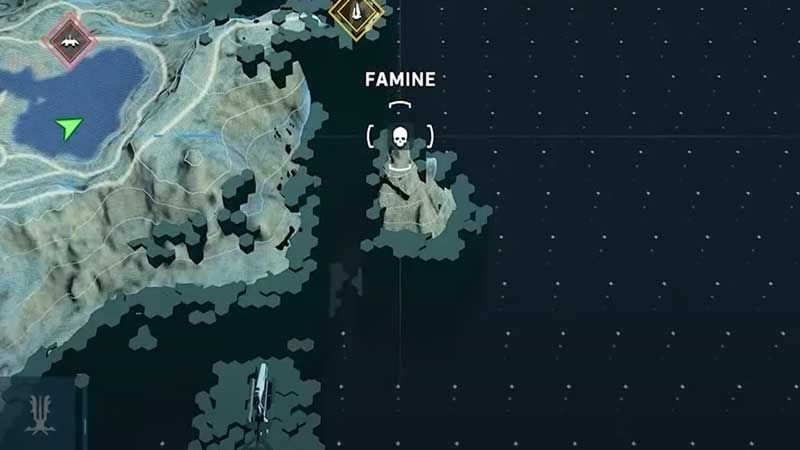
You will find the Famine Skull in Island 4 – Sequence. This skull reduces the ammo that enemies receive from weapons dropped by half as its effect.
To get to this skull, you first need to head to a landmass towards the south of the easternmost beacon. In order to get here, we recommend you either summon a Wasp at a FOB or rob a Banshee. You can even try to use the Grappleshot. However, we do not recommend this, as it is easier said than done, along with being excessively time-consuming.
Once you get either of the recommended mediums of transport, fly to the island’s eastern side. When you do so, you will most likely hear the skull even before you see it. Upon getting closer to the sound, you will find a golden Elite towards the eastern side of the rock. You need to carefully get down there and snatch the Famine skull off his hands.
Black Eye Skull
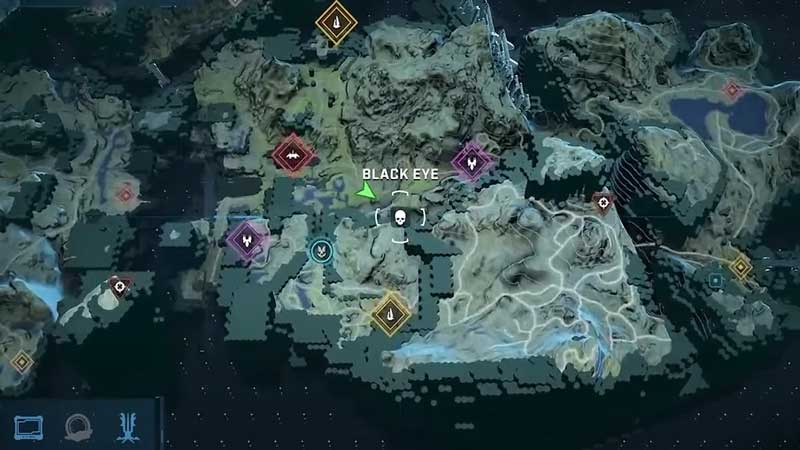
The Black Eye Skull is located in Island 4 – Sequence. Its effect grants a recharge to your shields whenever you melee enemies.
To get to this skull, you need to go to the lake located between Riven Gate and FOB Kilo. You need to follow the waterfall right until its base. Once you get to the base, look up at the waterfall. Towards the middle of the waterfall, you will notice an opening.
You can get to this opening with the help of the Grappleshot. Here, you will find a ledge you can use to support yourself. You will now be able to see a small square opening with red light inside. At this point, you should also be able to hear the skull. Keep following the sound by crawling into the said opening. You will now be able to get your hands on the Black Eye Skull.
Thunderstorm Skull
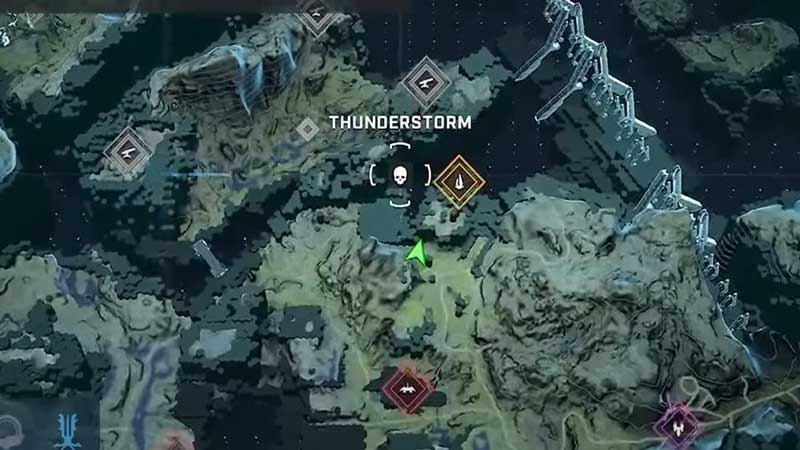
You will find the Thunderstorm Skull in Island 4 – Sequence. Its effect causes an increase in the ranks of most enemies.
You will find the Thunderstorm Skull on top of a pillar located close to a tall, slim peak towards the east of the northernmost beacon. Upon climbing to the top of this hill, you will find the corpse of a Marine, an audio log, a dead Brute, and a sniper.
A little further away from the Brute, you will find a Grunt. Going even further will show you more dead Grunts, along with an unusual-looking pillar next to them. From here, you can use a sniper scope to view the skull. Once you locate it, get off the cliff and drop down to the pillar of the skull.
You can use the Grappleshot to make your way up the pillar. Like we mentioned earlier in this guide, you can also make use of a Wasp or Banshee.
Mythic Skull
You can locate the Mythic Skill in Mission 11 – The Command Spire. This skull affects enemies by increasing their health.
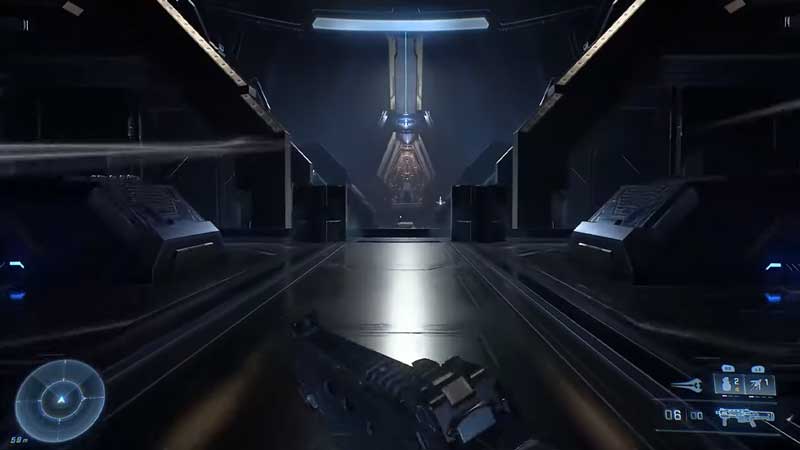
To get to it, you need to find a large pillar processing room. You will find it after passing by a grav lift. Inside this room, you will find a big amount of Grunts and Brutes. You need to kill them and continue heading straight down a long room split by the golden processing light. This light will transform the hexagonal pillars.
As the pillars turn towards the right, you will encounter 2 Sentinels, along with many more Grunts and an Elite. You need to eliminate all of them to clear the area. Now, simply hop onto the support beam against the wall. You will find this wall towards the left of the weapon rack. Make use of the Grappleshot to do so. You need to jump onto the floating beams before it turns towards the right. Make your way up, and then continue to use the Grappleshot to grab a ledge in the darkroom right above you.
Now, look up and hook onto the higher ledge with the help of the Grappleshot. Here, you will find a blue door. Move through the hallway to locate a room with the Mythic Skull.
Grunt Birthday Party Skull Location in Halo Infinite
The Grunt Birthday Party Skull is located in Mission 12 in the Repository. Its effect results in glorious celebrations of confetti among cheers during each Grunt headshot.
To get to this skull, you will need to get to a terminal on a structure in the middle of the room. You will find two light bridges connecting this structure. You will learn about the said terminal from a threatening message received by Master Chief.
Upon receiving this message, you will notice the eastern and western doors turning blue. This means that the doors are open, but neither of the bridges will be able to connect them.
You will now encounter a Banished that you need to kill. Make use of the Grappleshot as you backtrack towards the door you earlier took to enter the bridge area. With the Grapplshot, you need to go to the eastern door.
We recommend you use the support beam between the door platforms for the Grappleshot, before heading upwards into the oblong center.
Next, jump downwards into the next door platform. To keep yourself safe, you can try using a Grappleshot. Moving through the hallway will show you a Power Seed. Grab this seed and get back to the platform. You only need to drop the seed if you encounter any Sentinels and need to kill them.
Now, use your Grappleshot to get back to the first door platform along with the Power Seed.
Next, cross the bridge and use the Grappleshot to go to the room on the western side. You need to cross it the same way you did the first time. Get inside this room and then head towards the right backside. Here, you will notice a crucible. You need to insert the Power Seed into this crucible, after which you will hear an assuring noise.
Next, you will find yourself in the middle of two rising platforms leading to mirrored golden rooms that have ramps. You can go through either of them. Once you do so, you will need to kill your enemies. There will be even more enemies as you head into the room where the two rising passages meet with each other. Make sure to have sufficient ammunition to make your way through these flocks of enemies.
After combating the enemies, you will find yourself in another room with a mirror. You will encounter a couple of Sentinels, after which you will also come across Banished. Kill all of them and stay in the room.
Remember the Power Seed you plugged into the crucible earlier? Well, that crucible opened the window located at the top of this room.
Once you get past this window, you will find the Grunt Birthday Party Skull. However, to get to it, you will need to battle a few more Elites. You can use the Threat Sensor to spot them.
Bandana Skull Location in Halo Infinite
You will find the Bandana Skull in Mission 15 – Silent Auditorium. This skull grants you unlimited weapons, along with weapon ammunition. You will also receive equipment cooldown as part of its effects.
Remember to not kill Sentinels during this mission.
To get to this skull, you need to get into a door towards the right side of the room that you can get to by following a light trail. If you kill any Sentinels, you will find the bridge closing and locking.
Head into this door. As soon as you do so, you will hear the skull. Follow the sound, and simply pick the skull by using a Grappleshot to ascend the pillar in the middle.
So there you have it. These are the locations of all 12 Skulls in Halo Infinite. Make sure to follow all the instructions in this guide, and you should be good to go. In the meanwhile, check out our guide on How to Defeat Tremonius in Halo Infinite.