Out of all the features provided by Valve, I like how it is so simple to Stream games on Steam. You just need a PC with good GPU support and a stable Internet Connection and boom! You can broadcast your gameplay to your Friends or Public with ease. The only few things you need to take care of is tweaking some settings on the Steam Client. Since these adjustments need to be made before starting the broadcast, this guide can help you with it.
How to Broadcast or Stream on Steam

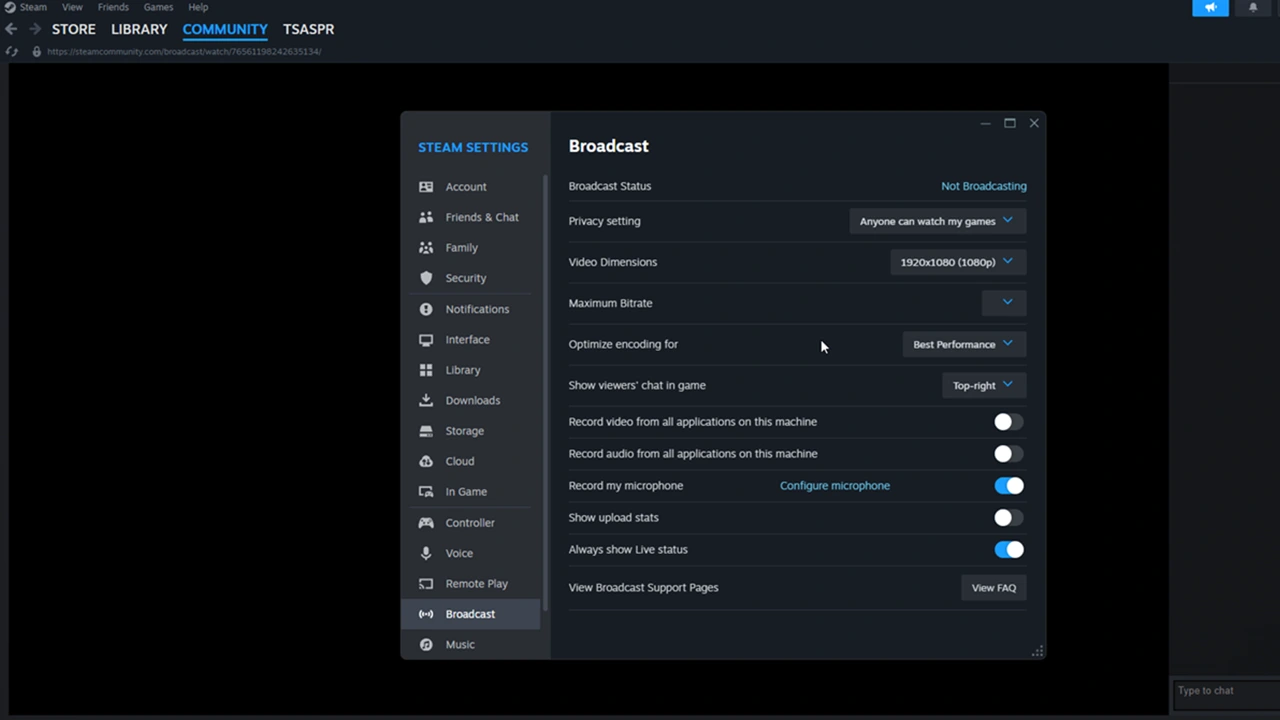
To start streaming your games on Steam without any hassle, you need to go to the Settings > Broadcast option. From there, make the following tweaks to get the best results:
- Broadcast Status: By default, it will show “Not Broadcasting.” However, it will change to “Broadcasting” once you change the Privacy Setting right underneath it and start streaming.
- Privacy Setting: You can change it to Friends or Public, depending on your preferred audience type.
- Video Dimensions: Adjust the video quality of your stream from 360p to 1080p from here. A speed and stable internet connection is required to stream on higher video settings.
- Maximum Bitrate: This setting controls the amount of internet bandwidth consumed by your stream to transfer the information (your content) from your PC to the viewer. Choosing a higher Bitrate is recommended if you have a speedy internet connection.
- Optimize Encoding: You can change this setting to Best Quality or Best Performance according to your preference. If you select the former, the viewer will get peak quality but with a few lags and stutter. On the other hand, opting for the latter means offering a stable streaming experience with little to no compromise on the video quality.
- Show Viewers’ Chat In-game: Decide where you want to display the live chat of your viewers. You can choose to disable it if you don’t want any disturbance.
- Record Video from all Applications on this Machine: Enabling this setting means your stream will still broadcast if you switch to a different tab while gaming. If you keep it disabled then the stream will show a “Please Stand By” message to your viewers until you get back to the game.
- Record Audio from all Applications on this Machine: If you enable it then your broadcast will also capture the audio coming from other tabs or applications on your PC.
- Record my Microphone: Enable it so your viewers can hear your voice while streaming. Click on the “Configure Microphone” button to make some adjustments like Voice Input/Output devices and Volume.
Getting Started with the Stream
Once you are done fine-tuning the above settings, you can start your Stream on Steam. Make sure the Privacy setting is set to Friends or Public. Then start a game and Steam will automatically start broadcasting your gameplay. If you have restricted the stream to Friends only, then here’s how they can watch it:
- Ask your friends to go to their Steam Friends list and right-click on your username.
- They will get an option called “Watch Game.”
- Selecting it will redirect them to your live stream.
Other people can watch your Stream by going to the Broadcast section in Steam Community.

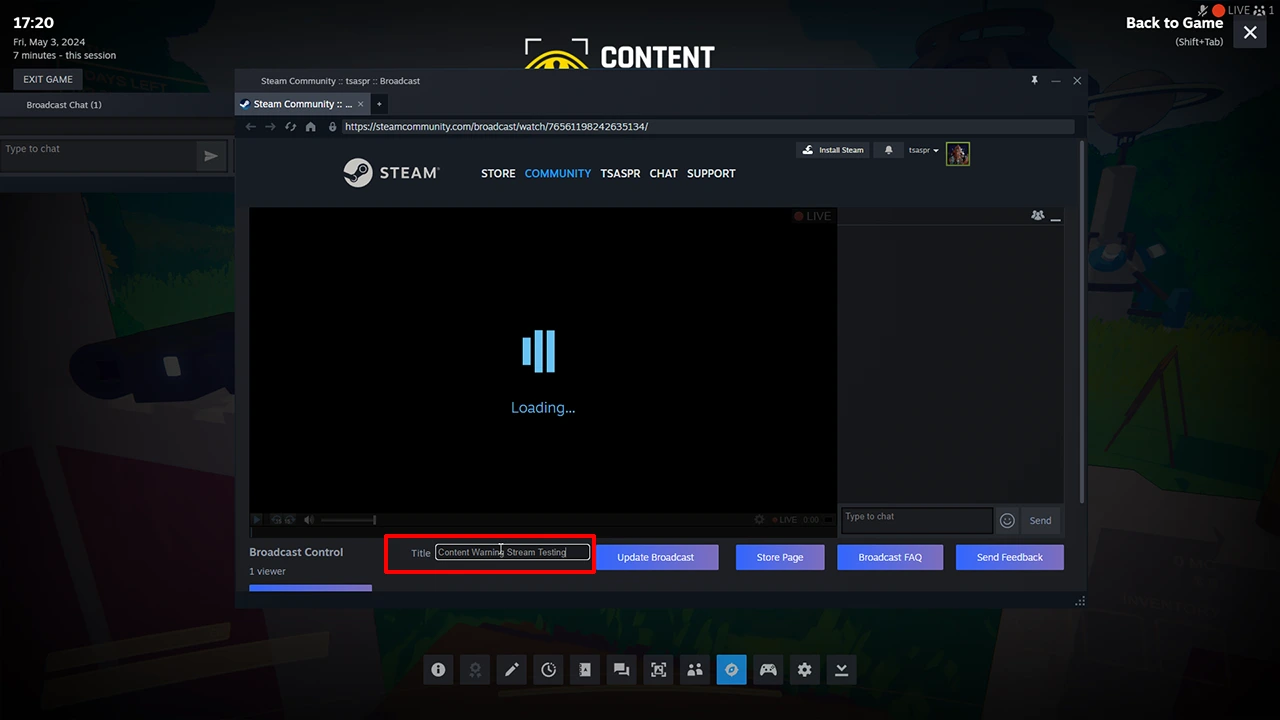
One more thing, press Shift + Tab to access the Steam Overlay. From there, you will get an option to watch your Stream along with the ability to change the Title of your Stream.
That’s all you can do to Stream your favorite games on Steam. If you are willing to learn more about this platform, we have a dedicated section for you. Feel free to access content related to Steam and Video Games on your website.

