Looking for ways to enable Bubble Chat in Roblox? If yes, then don’t worry we have got you covered. Roblox Studio allows you to enable speech bubbles over a character’s head so that players can communicate with each other with ease. This makes your experience more immersive and a lot more interactive than having a big chat window on your screen. Customizing your game with such features, you can make the gameplay more unique and stick out from all the experiences out there. So if you are wondering how to customize the chat appearance but are finding it tricky to do so, check out this guide further to know more about it.
How to Enable Bubble Chat in Roblox Studio

For users who want to enable Bubble Chat over the player’s avatar in the game, here are the steps you can follow to do so in Roblox Studio and customize it further according to you:
- Launch Roblox Studio on your device.
- Head towards the My Games tab.
- Select the game you want to add the option.
- Open the game and let it load.
- Once done, select the play option from the upper bar.
- After which head toward the Explorer Window.
- Click on the drop-down arrow next to TextChatService.
- Here, select the BubbleChatConfiguration option.
- Enable the Properties option from the upper bar.
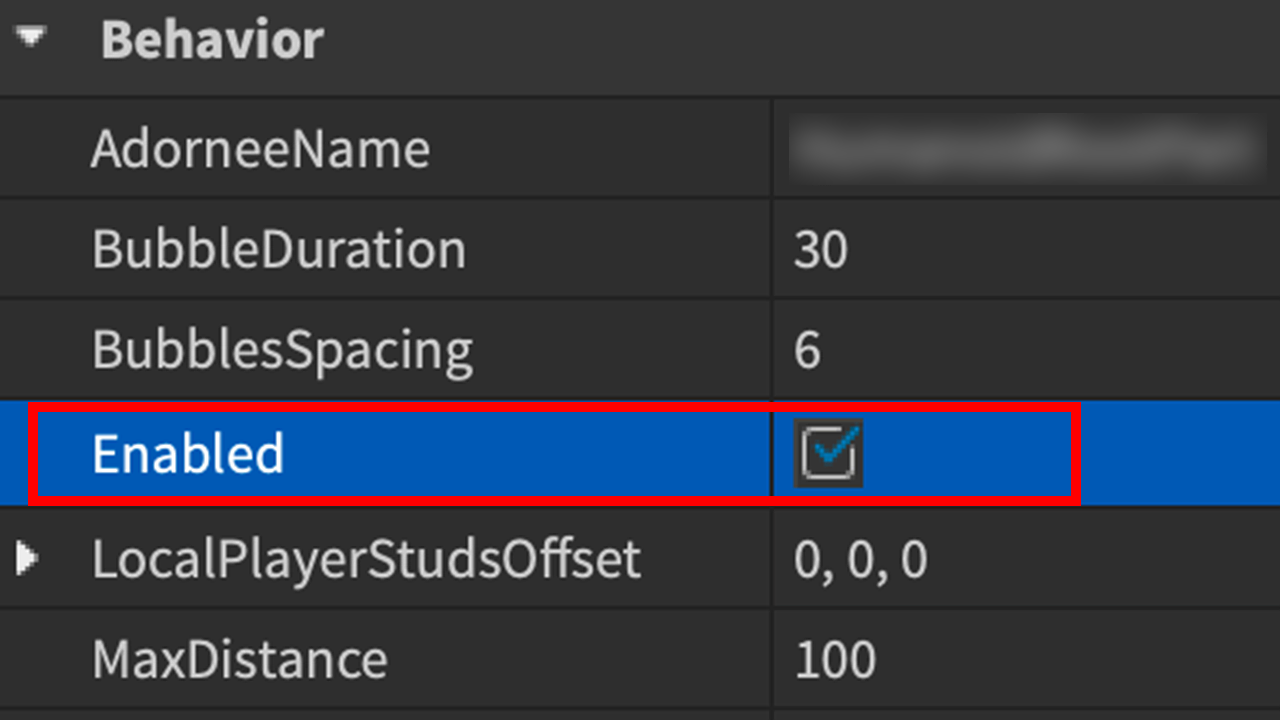
- In the window, check the box beside Enabled.
- Check out the feature in the game once you enable it.
You can also customize the bubble chat according to you in Roblox Studio. There are different options for you to choose from, from background color to the distance between the avatar and the text.
That’s everything covered on how to enable bubble chat in Roblox Studio. For more guides like these check out the dedicated Roblox section, right here on Gamer Tweak.

