One of the most intriguing and basic builds one can learn how to build in Minecraft is that of a toilet. The classic bowl and water build is now pretty well known and many players have built it to add to the aesthetics of their world. In this guide, we’ll walk you through the steps required to build a classic toilet!
How to Build a Toilet in Minecraft?
In order to keep it beginner-friendly and simple, we’ve crafted this guide to get you to construct a classic bathroom toilet with a water bowl graphic. Follow these steps and construct your very own toilet in Minecraft!
- Gather the following resources:
- White Banner
- Pistons
- Stairs(Quartz)
- Blocks(Quartz)
- Armor Stand
- Diamond Helmet
- Redstone Blocks
- Start by creating a wall and floor surface at a location of your choice. Since we’re building a classic toilet we’re going with quartz all around.
- Now on your surface, leave a block from the wall you’ve built and dig a hole in the surface.
- Next place your armor stand inside this empty block, ensuring you’ve kept it straight. In case you feel it isn’t straight, redo it until placed straight.
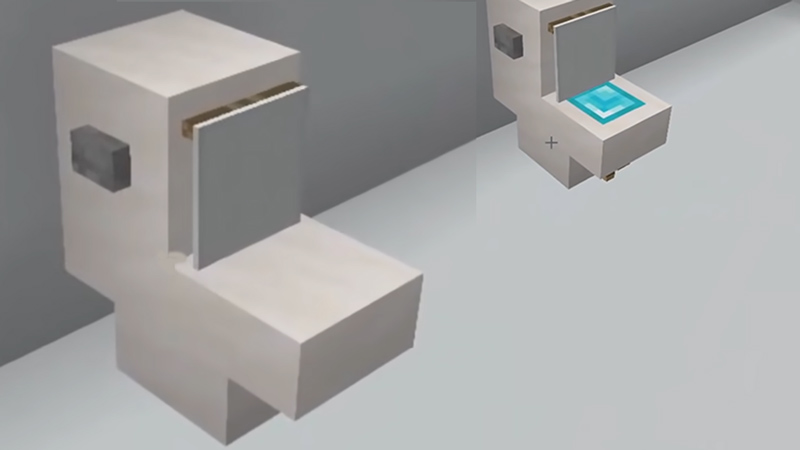
- In order to get that perfect water in the bowl graphic, place a diamond helmet over it.
- Now place a block over the diamond helmet. Do this by first placing a block by using the wall as support and then place the other one. Make sure you’re using the same type of block that you dug out in step 3.
- In the same manner, you need to now place a piston over the block- facing it.
- Next, place a Redstone block at the side of the piston, and after the first thrust- place another Redstone block in between the piston and the block pushed down.
- Additionally, place another Redstone block on the side of the piston. Break the Redstone block on the surface.
- You’ll see that your dug-out space is now the same shade as the rest of the surface and furthermore, your armor stand is firmly in position.
- Now place one stair, inverted– under the piston, and apply another Redstone block at the side of the piston. You can destroy the piston now.
- In Addition to the inverted stairs, use another one but facing the wall such that they are back-to-back.
- On top of the second stairs, place another block and put the white banner in front of it.
- Now add a button at the side of the block.
- Your toilet is now ready!
This was a basic yet classic toilet build in Minecraft. This guide was to help you and we hope you liked it! If you like building cool stuff in Minecraft, here’s a guide on how to build an item frame!